

There’s something utterly magical about the holiday season, isn’t there? It’s a time when the air is filled with a symphony of scents – from cinnamon and nutmeg to the sweet, tart aroma of fresh berries. This year, I want to share a recipe that perfectly encapsulates that festive spirit: Luxurious Pistachio & Raspberry Holiday Cheesecake Domes. These little delights are not just desserts; they are moments of pure indulgence, experiences that bring friends and family together around the table. As you dive into the creamy pistachio goodness, your taste buds will dance with joy at the burst of tangy raspberry hidden within. Trust me when I say, this is a treat that deserves a spot on your holiday table!
What makes these cheesecake domes so special is how they effortlessly blend tradition with a touch of innovation. The smooth richness of cream cheese combined with the unique flavor of pistachio creates a filling that’s both luxurious and comforting. And let’s not forget about that vibrant raspberry center – it adds a pop of color and an explosion of flavor that brightens every bite. Whether you’re hosting an elegant dinner party or simply looking to impress your loved ones, these domes will leave everyone in awe. So grab your apron, and let’s embark on this delightful culinary journey together!
Luxurious Pistachio & Raspberry Holiday Cheesecake Domes: A Sweet Celebration in Every Bite
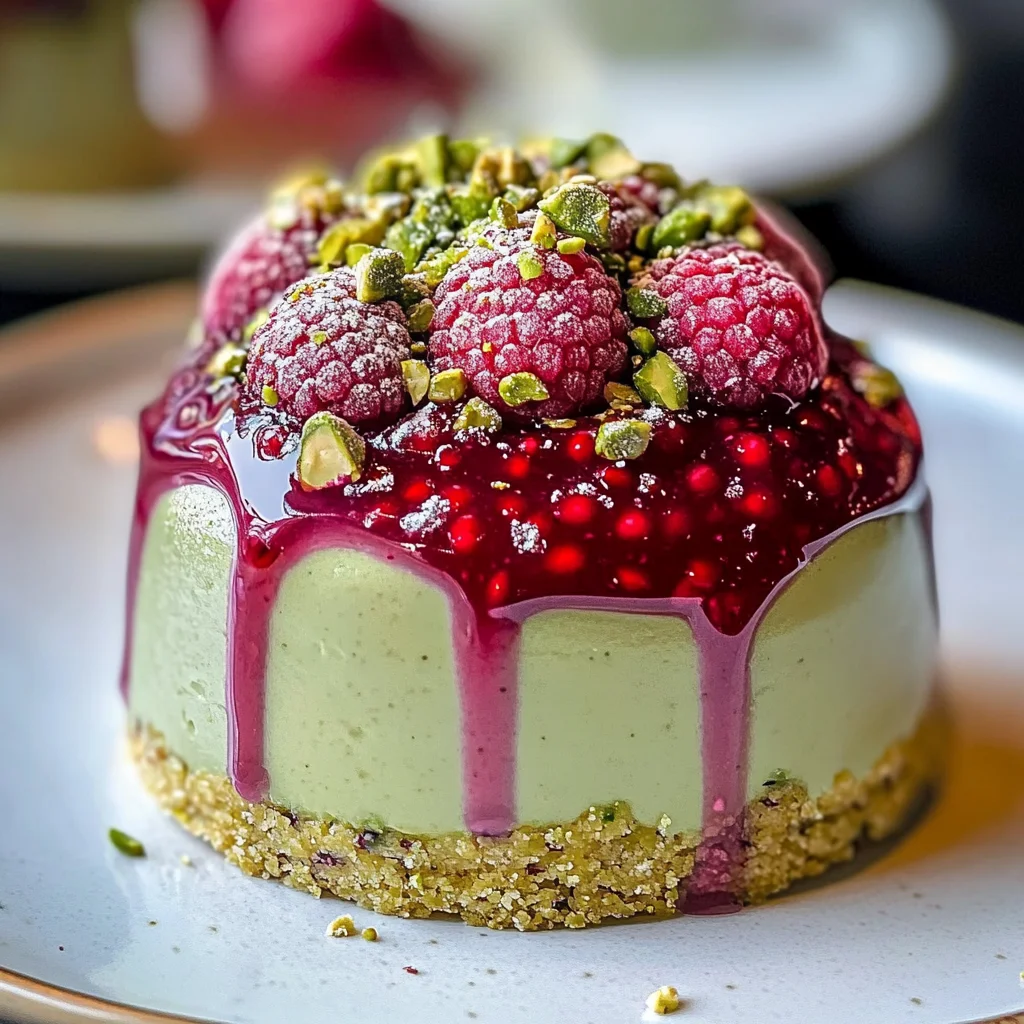
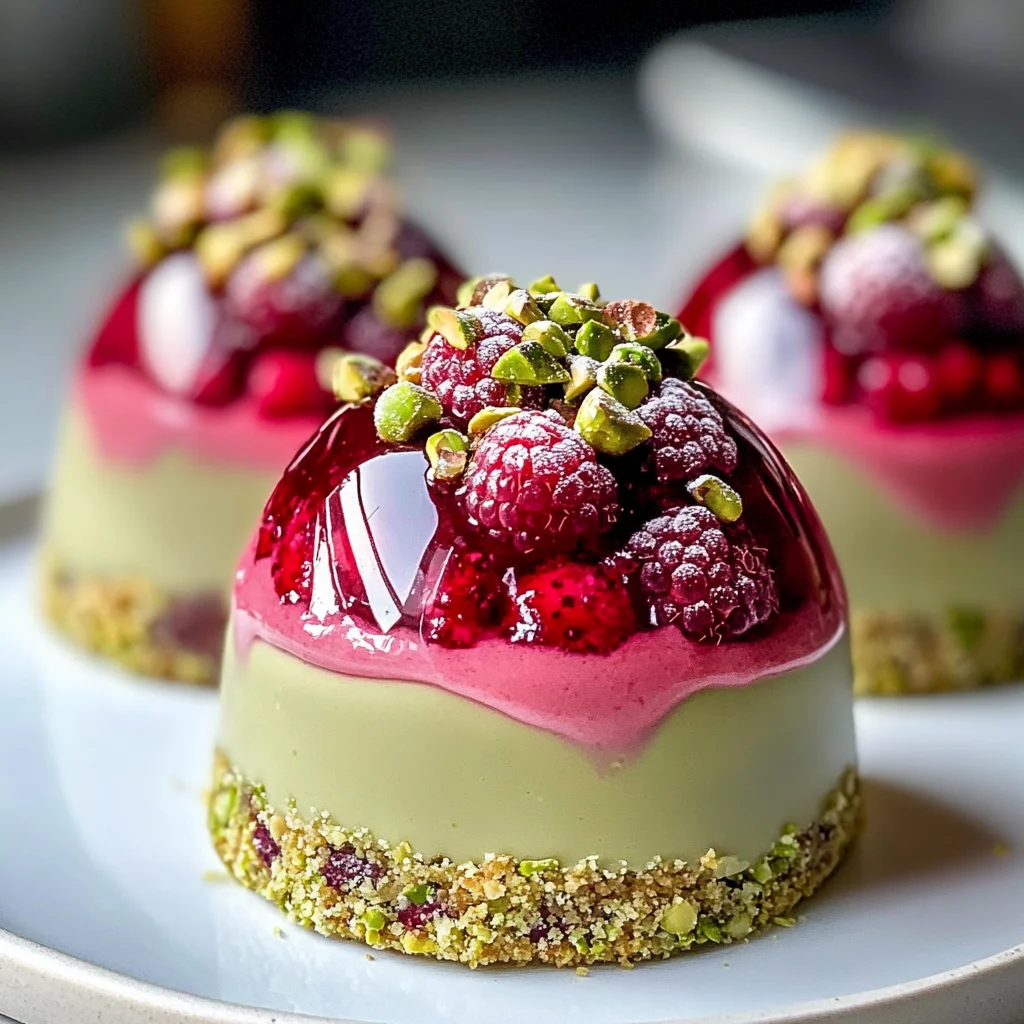
This recipe for Luxurious Pistachio & Raspberry Holiday Cheesecake Domes invites you into a world where flavors intertwine beautifully and every forkful feels like a celebration. With rich pistachio cheesecake enveloping a tart raspberry center, each dome promises to be an exquisite treat for both your palate and soul.
Ingredients:
As we gather our ingredients for this luxurious creation, remember that each element plays an essential role in crafting this masterpiece. Let’s dive into what you’ll need to create these stunning cheesecake domes.
- 12 oz cream cheese, softened. This is the heart and soul of our cheesecake filling, providing that rich, creamy texture we all crave. When softened properly, cream cheese becomes pliable, allowing it to blend seamlessly with the other ingredients without any clumps. Look for high-quality cream cheese for the best flavor; it should be smooth and spreadable with no metallic taste.
- 1/3 cup sugar. Sugar acts as both a sweetener and a key player in balancing flavors in our cheesecake domes. It helps to enhance the natural sweetness of the pistachios while softening any tartness from the raspberries later on. I recommend using granulated sugar for its ability to dissolve easily during mixing; it’s non-negotiable for achieving that silky-smooth texture.
- 1/2 cup pistachio paste. Ah, pistachio paste! This ingredient brings not only flavor but also an enchanting green hue to our cheesecakes. The paste should be made from roasted pistachios ground into a fine consistency – look for options without added sugars or preservatives for optimal taste and purity. The richness of the nuts adds depth to our dessert that is simply divine.
- 1 teaspoon vanilla extract. Vanilla extract is like the warm hug in our recipe; it ties everything together beautifully with its aromatic essence. Always opt for pure vanilla extract over imitation; it’s more potent and provides a truly authentic flavor experience that elevates this luxurious cheesecake.
- 1/2 cup heavy cream. Heavy cream is essential for adding lusciousness to our filling while also providing stability as it whips up beautifully thick and fluffy when beaten. It’s important to use heavy cream with at least 36% fat content so that it can whip properly – anything less may result in watery cream which could ruin our delicate balance.
- 1 tablespoon vegan gelatin + 3 tbsp warm water. Vegan gelatin serves as our setting agent here, allowing us to achieve those perfect dome shapes without any animal-derived products! Mixing it with warm water activates its gelling properties – ensuring our cheesecakes hold their form while remaining delightfully creamy.
For the Raspberry Center:
– 1 cup raspberries. Fresh raspberries bring that vibrant pop of color and tartness necessary to contrast against the rich pistachio cheesecake filling beautifully! Choose plump berries that yield slightly when pressed but are still firm enough; they should have a lovely bright red hue without blemishes.
- 2 tablespoons sugar. Just as we did with the other components, sugar here enhances the natural sweetness of those lovely raspberries while mellowing out their acidity just enough so we can enjoy their flavor fully without overwhelming tartness.
Equipment You’ll Need:
Before we start assembling these little gems, let’s ensure you have all the right tools at hand! Having quality equipment can make all the difference between chaos and joy in your kitchen adventure.
- Mixing bowls – A good set of mixing bowls is crucial; you’ll need them in various sizes for combining different components of our recipe smoothly without spills or messes! Opt for glass or stainless steel as they’ll withstand heat if you’re ever mixing warm ingredients.
- Electric mixer or whisk – For achieving perfectly whipped cream and smooth batter consistency, an electric mixer will save you time and effort! However, if you prefer doing things by hand (and getting some arm workout!), using a whisk works too; just be prepared for some extra elbow grease!
- Silicone molds or muffin tin – These will help shape your cheesecake domes beautifully! Silicone molds are my favorite because they allow easy release after setting while giving pretty shapes without needing additional flourishes or decorations.
- Spatula – A good rubber spatula will come in handy when it comes time to scrape down bowls and fold ingredients gently into one another – trust me on this one; it’s absolutely paramount for avoiding waste!
Now that we’ve gathered everything we need let’s get started on preparing these Luxurious Pistachio & Raspberry Holiday Cheesecake Domes!
Preparing the Luxurious Pistachio & Raspberry Holiday Cheesecake Domes
Step 1: Creating Our Creamy Base
To start off this delightful journey, we’ll begin by preparing our luscious pistachio cheesecake filling! First things first: make sure your cream cheese has been sitting at room temperature long enough so it’s soft—this step cannot be rushed because if it’s too cold, you’ll end up with lumps instead of velvety smoothness which would be utterly tragic! In your mixing bowl (I recommend using one large enough to accommodate everything), combine 12 oz softened cream cheese with 1/3 cup sugar and 1/2 cup pistachio paste along with 1 teaspoon vanilla extract. Using an electric mixer fitted with paddles (or your trusty whisk), beat these ingredients together until they’re well-blended—this usually takes about 2–3 minutes at medium speed until it looks creamy like liquid gold!
Step 2: Adding Whipped Cream
Once you’ve achieved that silky texture—oh my goodness—you may want to take a moment just to appreciate how amazing it looks before adding more decadence! Next comes 1/2 cup heavy cream which needs whipping until soft peaks form — about 3–5 minutes on high speed should do nicely here! The key thing here is not over-whipping; otherwise you’ll get butter rather than light fluffy clouds ideal for folding into our mixture later on! Once you’ve reached those lovely peaks (like soft pillow tops), gently fold half into your previous mixture using your spatula—this process known as folding allows air bubbles from whipped cream remain intact so we retain maximum lightness throughout!
Step 3: Setting Our Mixture
With most elements combined now comes time-sensitive magic: adding vegan gelatin mixed previously in warm water directly into mix while continuing folding gently till fully incorporated—this step is crucial since it’ll help solidify everything once chilled later on! Don’t rush through this part either; take your time making sure nothing gets left behind—after all no one wants gummy bits laced through their dessert right? Now transfer this heavenly concoction straight into prepared silicone molds or muffin tins evenly distributing among them before covering tightly with plastic wrap then letting chill overnight (or at least four hours) until set completely firm yet still creamy inside—trust me when I say waiting pays off big time!
Step 4: Preparing Our Raspberry Center
While our cheesecakes chill blissfully away creating those delicious shapes we adore let’s turn attention towards fruity raspberry centers next! In another bowl combine fresh raspberries (a whole cup!) alongside two tablespoons sugar stirring gently enough not crush berries too much but allowing those juices release slightly creating syrupy goodness surrounding them… mmm divine already right? Let this mixture sit aside while patiently waiting till we’re ready layer inside once cheesecakes have set properly—this method keeps contrasting flavors distinct ensuring each bite remains excitingly refreshing amidst richness found elsewhere!
Stay tuned as we continue crafting these Luxurious Pistachio & Raspberry Holiday Cheesecake Domes further along…
Step 5: Create the Heavenly Pistachio Cheesecake Base
Now we’re diving into the heart of our Luxurious Pistachio & Raspberry Holiday Cheesecake Domes with the creation of that rich, velvety cheesecake base. Start by placing your softened cream cheese in a large mixing bowl, and I cannot stress this enough: make sure it’s at room temperature! This little step is crucial because cold cream cheese can lead to lumps in your cheesecake, which we definitely want to avoid. Using a hand mixer or a stand mixer fitted with the paddle attachment, whip that cream cheese until it’s utterly smooth and creamy—this will take about two minutes on medium speed. Just imagine how fluffy and inviting it will become!
Once you’ve achieved that perfect texture, gradually add in the sugar while continuing to mix. This process not only sweetens your mixture but also helps incorporate air into the cheesecake, making it light and dreamy. Next up, it’s time for the pistachio paste! I always find it mesmerizing to watch as that vibrant green hue transforms our mixture into something truly special; it’s like nature’s own masterpiece. Trust me when I say that this pistachio paste is what elevates this dessert from simple to sublime. After adding one teaspoon of vanilla extract for a touch of warmth and depth, you’ll be ready for the next step.
In another bowl, pour in your heavy cream. You’ll need to whip this until soft peaks form—this means when you lift out your whisk or beaters, the cream should hold its shape but have a gentle curve at the tip. This technique adds an airy quality to our cheesecake, creating a delightful contrast with the denser elements. Gently fold this whipped cream into your cheese mixture using a spatula; you want to be tender here! The goal is to maintain that volume we just created while ensuring everything is well combined. Folding is an art form—it’s all about coaxing those layers together without deflating them.
Finally, let’s tackle our vegan gelatin! Mix one tablespoon of vegan gelatin with three tablespoons of warm water until fully dissolved. This step is absolutely paramount as it will help set our luxurious cheesecake domes firmly yet gently without any animal-derived products. Once everything is beautifully combined, take a moment to admire your creation—this base is going to be nothing short of extraordinary!
Step 6: Crafting the Irresistible Raspberry Center
Now comes the fun part—the raspberry center! Grab your fresh raspberries and place them in a small saucepan over medium heat along with two tablespoons of sugar. As they heat up, you’ll start to see them release their juices and soften beautifully—a sensory experience that fills your kitchen with an utterly intoxicating aroma! Allow these fruits to simmer gently for about 5 minutes; this process not only enhances their sweetness but also helps concentrate their flavor into a luscious sauce that will complement our velvety pistachio base perfectly.
Once those raspberries are bubbling away and look gloriously saucy, remove them from the heat and let them cool slightly before transferring them into a fine mesh sieve set over a bowl. Using the back of a spoon or a spatula, press down on the berries to extract every last drop of that vibrant raspberry juice while leaving any seeds behind. It’s so satisfying to watch as those beautiful drops pour through—it’s like liquid gold! The resulting raspberry puree will be both tart and sweet—a striking balance against the richness of our cheesecake.
At this stage, patience is key; allow your raspberry mixture to cool completely before we incorporate it into our cheesecake domes later on. Why chill? Cooling ensures that when we layer these components together in our molds, we maintain distinct layers rather than creating an unappealing muddle. It’s all about achieving that visual wow factor when serving up these stunning desserts!
Step 7: Assembling Your Cheesecake Domes
With your beautiful pistachio cheesecake mixture and raspberry center ready, it’s time for assembly! Grab some silicone dome molds—these are perfect as they allow for easy release once frozen—but if you don’t have them handy, small cups or muffin tins lined with plastic wrap can also work just fine! Start by spooning just enough pistachio cheesecake mixture into each mold so that they are filled about halfway; use the back of a spoon or an offset spatula to spread it evenly across the bottom.
Now comes the magic moment—take your cooled raspberry puree and carefully drizzle or spoon it right in the center of each dome on top of that luscious pistachio layer. Don’t worry about being too perfect here; some may spill over slightly into that green realm beneath it—that’s part of its charm! Finally, fill each dome with more pistachio mixture until they’re perfectly full. Smooth out the tops once again for presentation because trust me—you want these beauties looking their very best before they head into their chilly slumber.
Once assembled, give each mold a gentle tap on your countertop; this helps eliminate any air bubbles trapped inside—nobody wants unexpected surprises when they bite into these divine treats! Cover each mold with plastic wrap or foil so they don’t get freezer burn (yikes!) and place them carefully in your freezer. Now comes my favorite part: waiting patiently as these gorgeous domes freeze solid for at least 4 hours—or even overnight if you can resist!
Step 8: Freezing & Unmolding Your Cheesecake Domes
Ahh, now we arrive at one of life’s great anticipations—the moment when you get to unveil your frozen masterpieces! After allowing those luxurious cheesecake domes at least four hours (but ideally overnight) in the freezer, check their firmness by gently pressing on one with your fingertip—it should feel solid yet spring back ever so slightly when pressed—that’s how you know they’ve set beautifully!
To unmold these gems without damaging their lovely shapes—which can sometimes be nerve-wracking but oh-so-satisfying—simply invert each mold onto a plate or cutting board while giving them a gentle squeeze (thanks again for those silicone molds!). If you’re using plastic wrap-lined tins or cups, just peel back slowly until you reveal those stunning domes beneath. You might want to take a moment here just to admire how glorious they look—the vibrant green peeking through hints at deliciousness ahead!
As you’re unmolding each dome, keep an eye out for any imperfections; if there are slight cracks or uneven edges—don’t fret! A sprinkle of crushed pistachios or fresh raspberries can cover those tiny imperfections beautifully while adding an extra flair on top. Remember: perfection isn’t necessary; it’s all about enjoying every step along this delicious journey together!
Final Touches: Garnishing Your Luxurious Creation
Now comes my favorite part—adding those final touches that transform these already impressive desserts into show-stopping sensations worthy of any holiday gathering! Grab some crushed pistachios and scatter them atop each dome liberally—this not only adds a lovely crunch but also enhances their visual appeal dramatically with those beautiful flecks contrasting against the creamy surface.
If you’re feeling particularly festive (and let’s be honest—who isn’t?), consider adding edible gold leaf pieces atop each dome for an added touch of elegance that’ll leave everyone gasping at their beauty! Alternatively, fresh raspberries scattered around provide not only color contrast but also hint at what lies within—an invitation no one can resist!
Before serving these luxurious creations at your holiday table or gathering (or perhaps just keeping them all for yourself!), allow them to sit at room temperature for about 10-15 minutes before slicing into one so they soften slightly—they’ll be far easier—and more enjoyable—to cut through when they’ve had that extra moment outside their icy haven.
I promise you—the first bite will send waves of joy through every taste bud as flavors collide harmoniously in an utterly exquisite manner; sweet yet tart raspberry centers meet rich decadent pistachio cheesecakes in pure blissful unity. Each bite is profoundly satisfying—a testament not only to skillful technique but also love infused throughout every stage from mixing bowls all way down onto plates surrounded by laughter shared among friends and family alike.
So gather around this holiday season armed now not just with ingredients but stories woven together through cooking magic—that’s truly what makes these Luxurious Pistachio & Raspberry Holiday Cheesecake Domes something spectacular worth sharing!
Storage and Enjoyment Tips for Your Luxurious Pistachio & Raspberry Holiday Cheesecake Domes
Ah, the moment has finally arrived! Your Luxurious Pistachio & Raspberry Holiday Cheesecake Domes are ready to dazzle your taste buds and bring joy to your gatherings. But wait—before you dive in, let’s talk about how to keep these delightful treats fresh for as long as possible. There’s nothing worse than savoring a bite of your creation only to find it has lost its luster due to improper storage. Trust me on this: with just a few simple tips, you can ensure that every bite remains as heavenly as the first.
Storing Leftover Luxurious Pistachio & Raspberry Holiday Cheesecake Domes
To keep your cheesecake domes in peak condition, place them in an airtight container. This is absolutely crucial; you want to prevent any lingering odors from your fridge from mingling with the delicate flavors of pistachio and raspberry. Ideally, these beauties should be stored in the refrigerator, where they’ll stay fresh for about 3-5 days. To maintain their decadent texture, consider placing a slice of bread in the container with them. This little trick absorbs moisture and helps keep the cheesecake domes from becoming too firm or losing their creamy goodness. After a day or two in storage, they will still taste divine, but the flavors might deepen and meld together beautifully, creating a symphony of indulgence that you won’t want to miss. When you’re ready to enjoy another round, simply take them out of the fridge and let them sit at room temperature for about 15-20 minutes before serving—this allows all those luxurious flavors to shine through.
Freezing for Later
If you find yourself with extra cheesecake domes (or if you’re planning ahead for a special occasion—smart thinking!), freezing them is a fantastic option. Just ensure they’re wrapped securely in plastic wrap or placed in freezer-safe containers; you want to keep out any pesky frost that could affect their creamy texture. These glamorous treats can be frozen for up to three months without losing their charm! When you’re ready to indulge again, take them out of the freezer and let them thaw overnight in the fridge. The convenience of having such an extraordinary dessert on hand makes entertaining a breeze—and trust me, your guests will marvel at your ability to whip up something so luxurious without breaking a sweat!
Dessert
Luxurious Pistachio & Raspberry Holiday Cheesecake Domes
Indulge in the festive delight of Luxurious Pistachio & Raspberry Holiday Cheesecake Domes. These charming little treats are a perfect blend of rich pistachio cheesecake and tangy raspberry filling, creating a balance of flavors that will elevate your holiday gatherings. Each bite offers a creamy texture complemented by the vibrant burst of raspberry, making them not just desserts but rather indulgent experiences to share with loved ones. Ideal for impressing guests or simply treating yourself, these domes encapsulate the spirit of the season with their elegant presentation and luscious taste. Get ready to embark on a delightful culinary journey that brings joy to any occasion!
- Prep Time: 30 minutes
- Cook Time: N/A
- Total Time: 0 hours
- Yield: Makes approximately 8 servings 1x
- Category: Dessert
- Method: Freezing
- Cuisine: American
Ingredients
- 12 oz cream cheese, softened
- 1/3 cup sugar
- 1/2 cup pistachio paste
- 1 teaspoon vanilla extract
- 1/2 cup heavy cream
- 1 tablespoon vegan gelatin + 3 tbsp warm water
- 1 cup raspberries
- 2 tablespoons sugar (for raspberries)
Instructions
- In a bowl, beat softened cream cheese with sugar until smooth. Add pistachio paste and vanilla extract; mix until combined.
- In another bowl, whip heavy cream until soft peaks form, then fold into the cream cheese mixture gently.
- Mix vegan gelatin with warm water until dissolved and fold into the cheesecake mixture carefully.
- Spoon half the cheesecake mixture into silicone molds, add raspberry puree made by heating raspberries and sugar, then top with remaining cheesecake mixture.
- Freeze for at least 4 hours (or overnight) until set, then unmold and garnish with crushed pistachios before serving.
Nutrition
- Serving Size: 1 dome (60g)
- Calories: 220
- Sugar: 14g
- Sodium: 120mg
- Fat: 15g
- Saturated Fat: 8g
- Unsaturated Fat: 6g
- Trans Fat: 0g
- Carbohydrates: 18g
- Fiber: 1g
- Protein: 4g
- Cholesterol: 45mg
Leave a Comment