

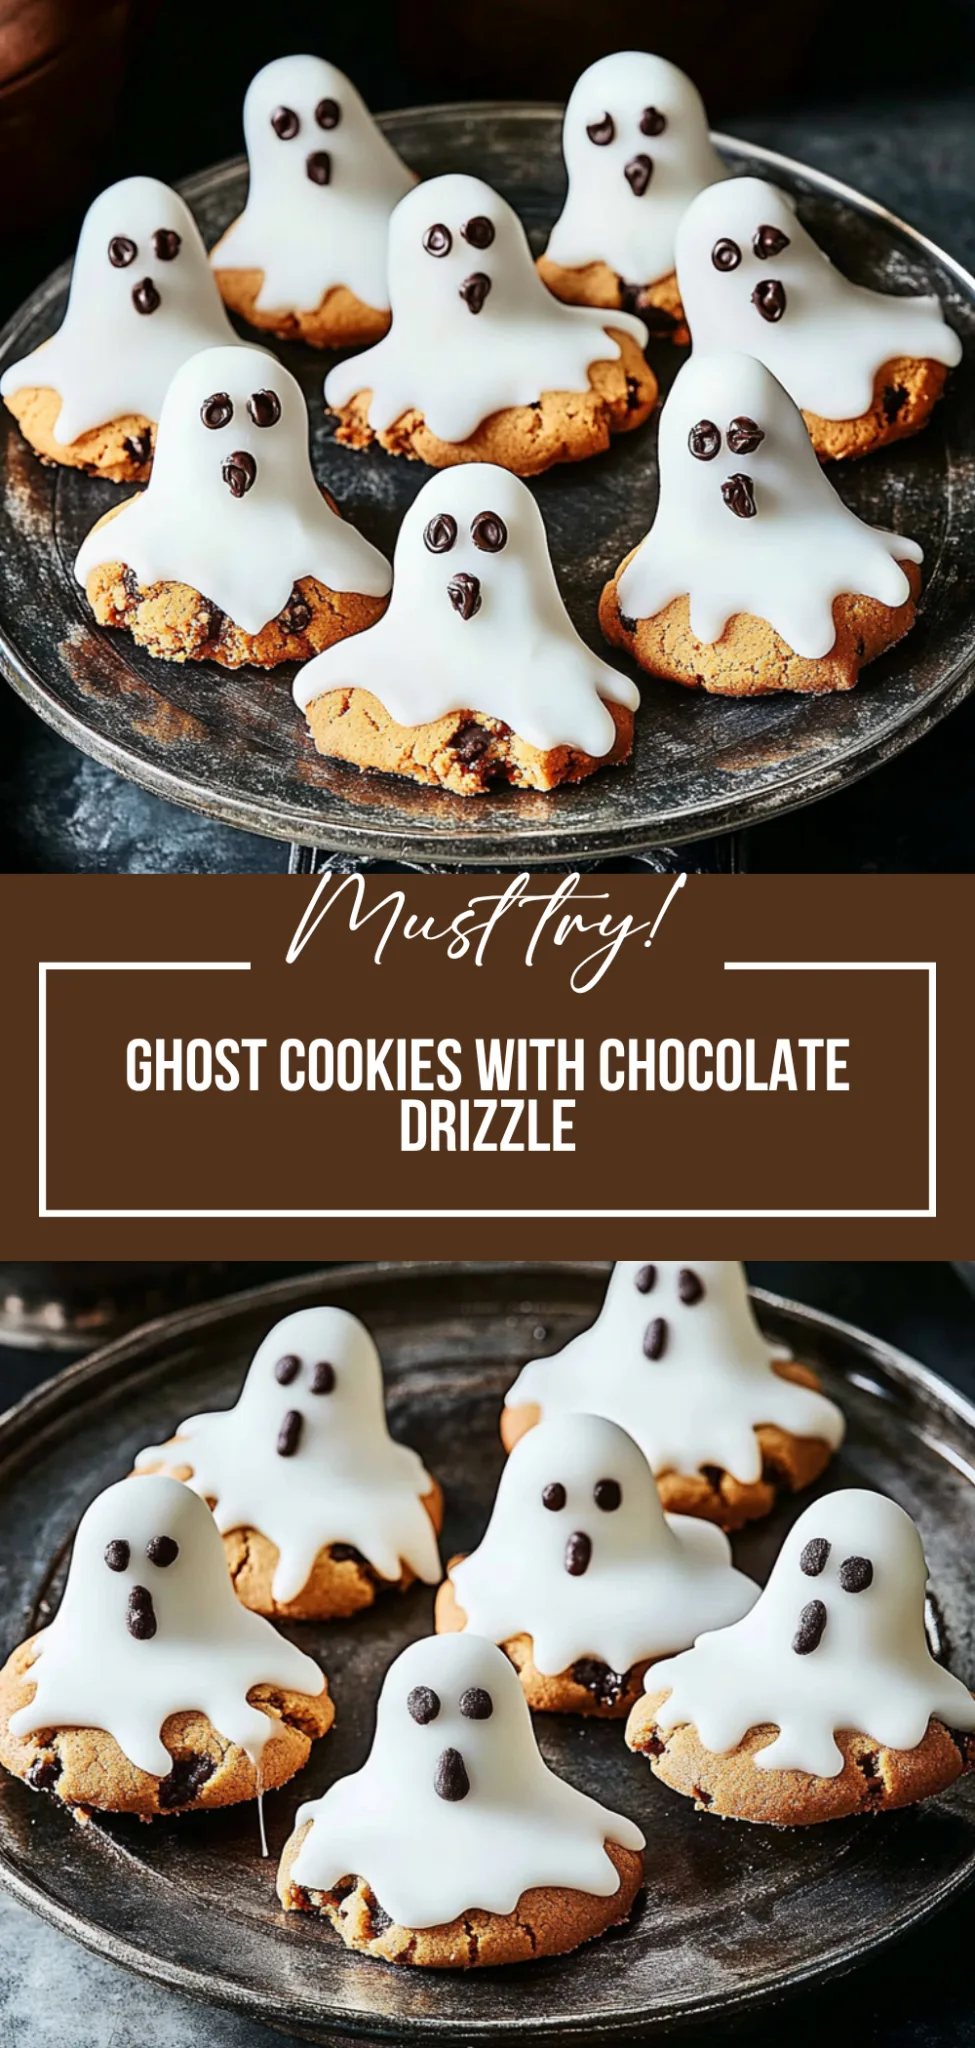
As the crisp autumn air sets in, the scent of freshly baked Ghost cookies wafts through your kitchen, inviting you to indulge in their delightful charm. These whimsical treats, adorned with smooth white icing and playful chocolate chip eyes, offer a perfect balance of soft and chewy texture that makes them irresistible. Ideal for Halloween gatherings or cozy family nights, they evoke a sense of nostalgia and warmth that makes every bite feel like a sweet embrace.
What truly sets these Ghost cookies apart is their enchanting simplicity; the blend of buttery dough and sweet icing creates a harmonious flavor profile that delights both kids and adults alike. Whether served at a festive party or enjoyed as an after-school snack, these cookies bring joy and togetherness to any occasion. Get ready to share some spooky fun and create lasting memories with every delicious bite!
Why You’ll Love This Ghost Cookies
These Ghost cookies are not just a treat; they’re a celebration of the season with their delightfully spooky design that will enchant both kids and adults alike. The cookie base, crafted from soft unsalted butter and a perfect blend of all-purpose flour, creates an irresistibly tender texture that melts in your mouth, while the touch of vanilla extract elevates the flavor profile to pure bliss. Topped with a glossy white icing and playful chocolate chip eyes, these enchanting cookies are as fun to decorate as they are to eat, filling your kitchen with the sweet aroma of Halloween magic. Get ready to create lasting memories and indulge in a delightful balance of sweetness—it’s time to whip up a batch of these delicious ghostly delights!
What Kind of All-Purpose Flour Should I Use?
For the best results in your Ghost Cookies, it’s ideal to use a high-quality all-purpose flour, such as King Arthur or Bob’s Red Mill. These brands have a consistent protein content that helps achieve the perfect balance between tenderness and structure, providing just the right texture for your cookies. While most all-purpose flours will work fine, opting for one with a higher protein content can yield a slightly chewier cookie that holds its shape better during baking. If you decide to use cake flour as an alternative for a softer cookie, be prepared to adjust the amount slightly—using about 1/4 cup less since cake flour is lighter and will create a more delicate texture.
Ingredients for the Ghost Cookies
Each ingredient in this dish plays an essential role in flavor and texture. Here’s what you’ll need:
- 2 cups all-purpose flour: Provides the structure and base for the cookies.
- 1 cup unsalted butter (softened): Adds richness and creates a tender texture.
- 1 cup granulated sugar: Sweetens the cookies and contributes to their lightness.
- 1 large egg: Binds the ingredients together while adding moisture.
- 1 teaspoon vanilla extract: Infuses a warm, comforting flavor throughout the dough.
- 1 teaspoon baking powder: Helps the cookies rise and achieve a fluffy texture.
- 1/2 teaspoon salt: Enhances the overall flavors and balances the sweetness.
Step-by-Step: How to Make Ghost Cookies

Perfect Results, Every Single Time! 🌡️
Never serve dry or undercooked food again. The Chef-X Digital Probe gives you an accurate temperature reading in under 3 seconds. It's the secret tool I use for perfect steaks, juicy chicken, and safe milk temperatures.
Cream the Butter and Sugar
In a mixing bowl, start by creaming together the softened butter and granulated sugar until the mixture is light and fluffy. This process should take about 2-3 minutes with an electric mixer on medium speed. The goal is to incorporate air into the mixture, which will help the cookies rise as they bake.
Add Egg and Vanilla
Next, beat in the large egg and one teaspoon of vanilla extract until everything is well combined. Continue mixing for another minute until you achieve a smooth and uniform batter. This step adds moisture and flavor to your cookie dough.
Combine Dry Ingredients
In a separate bowl, whisk together the all-purpose flour, baking powder, and salt until they are evenly mixed. This important step ensures that the leavening agent is distributed throughout the flour, which helps your cookies rise evenly during baking. Set this dry mixture aside while you prepare the wet ingredients.
Form the Dough
Gradually add the dry ingredients to the wet mixture, mixing just until a dough forms. Be careful not to overmix; you want to combine everything without developing too much gluten, which can result in tough cookies. The dough should be soft but not sticky.
Preheat Oven
Preheat your oven to 350°F (175°C) so it’s hot and ready when your cookies are shaped. This temperature helps create cookies that are golden on the edges while remaining tender in the center. Make sure to let it reach full temperature before baking for best results.
Roll Out Dough
On a floured surface, roll out your cookie dough to about 1/4 inch thick using a rolling pin. Dust your rolling pin with flour as needed to prevent sticking. Aim for an even thickness so that all cookies bake uniformly.
Cut Out Ghost Shapes
Using a ghost-shaped cookie cutter, cut out shapes from the rolled dough and carefully place them onto a baking sheet lined with parchment paper. Leave some space between each cookie, as they will spread slightly while baking.
Bake Until Golden
Bake your cookies in the preheated oven for 10-12 minutes or until their edges are lightly golden. Keep an eye on them towards the end of baking; they should look set but still pale in color on top. This timing ensures that they remain soft yet firm enough to hold their shape.
Cool Completely
Once baked, transfer the cookies to a wire rack and allow them to cool completely before decorating. Cooling is crucial as it prevents melting icing; warm cookies can cause it to slide off rather than stay put.
Prepare Icing
In a bowl, mix together 2 cups of powdered sugar, 2 tablespoons of milk, and 1 teaspoon of vanilla extract until you have a smooth icing consistency. If it’s too thick, add a tiny bit more milk; if it’s too thin, sprinkle in more powdered sugar until you reach your desired texture for decorating.
Decorate with Icing
Using a piping bag filled with your prepared icing, decorate each cooled cookie with ghostly faces. Take your time here—squeeze gently as you create eyes and mouths that bring your ghost cookies to life!
Add Chocolate Chip Eyes
Finally, place chocolate chips onto each decorated cookie as eyes while the icing is still wet so they stick properly. This adds not only charm but also deliciousness to each spooky treat!
How to Serve and Store Ghost Cookies
These delightful Ghost Cookies yield 4 servings, making them perfect for sharing at Halloween gatherings or cozy family nights. For an appealing presentation, arrange the cookies on a festive platter, perhaps with a sprinkle of edible glitter to enhance their spooky charm. Pair them with a glass of cold milk or hot cocoa to complement their sweetness and create a cozy atmosphere.
To store leftovers, place the cookies in an airtight container and keep them in the refrigerator for up to a week to maintain freshness. When you’re ready to enjoy them again, simply reheat the cookies in the microwave for about 10-15 seconds on low power; this will keep the cookie base soft and chewy without drying them out. While these cookies are best enjoyed fresh, they can be frozen for up to three months—though be aware that the icing may lose some texture upon thawing.
What to Serve With Ghost Cookies
Creamy Mashed Potatoes
The buttery richness of creamy mashed potatoes creates a delightful contrast to the sweet and spookily decorated Ghost Cookies.
Roasted Brussels Sprouts
The slight bitterness of roasted Brussels sprouts balances the sweetness of the cookies while adding a satisfying crunch.
Garlic Bread
Toasty garlic bread offers a savory note that perfectly offsets the sugary goodness of Ghost Cookies, making for an irresistible combination.
Spinach Salad with Balsamic Vinaigrette
A fresh spinach salad drizzled with balsamic vinaigrette introduces a tangy brightness that enhances the overall dessert experience.
Butternut Squash Risotto
The creamy texture and sweet earthiness of butternut squash risotto complement the rich flavors of the Ghost Cookies beautifully.
Pumpkin Soup
A warm bowl of pumpkin soup brings a seasonal spice that harmonizes deliciously with the vanilla and chocolate notes in the cookies.
Frequently Asked Questions
Can I use margarine instead of unsalted butter?
Yes, you can substitute margarine for unsalted butter in this recipe. However, keep in mind that the flavor and texture may differ slightly, as butter adds a rich taste that margarine may not fully replicate.
Are these ghost cookies gluten-free?
No, this recipe requires all-purpose flour, which contains gluten. If you need a gluten-free option, consider using a 1: 1 gluten-free flour blend designed for baking to achieve similar results.
Can I make the cookie dough ahead of time and freeze it?
Absolutely! You can prepare the cookie dough and wrap it tightly in plastic wrap or an airtight container to freeze. When you’re ready to bake, simply thaw it in the refrigerator overnight before rolling and cutting out your ghost shapes.
How can I tell when the cookies are done baking?
The cookies are done when the edges are lightly golden and they appear set. Keep an eye on them as they bake since oven temperatures can vary; start checking around the 10-minute mark.
What other decorations can I use besides chocolate chips?
Feel free to get creative with your decorations! You can use candy eyes, colored sprinkles, or even edible glitter to give your ghost cookies a fun twist while still keeping them festive for Halloween.
Before You Go
These Ghost Cookies are not just a treat; they’re a delightful addition to your Halloween festivities, sure to impress with their spooky charm and sweet flavors. If you enjoyed these, be sure to try out [Spooky Spider Cupcakes] or [Pumpkin Spice Muffins] for more seasonal delights that will keep the fun going. We’d love for you to save this recipe on Pinterest and share your spooky creations with our community—let’s celebrate together!

Leave a Comment