

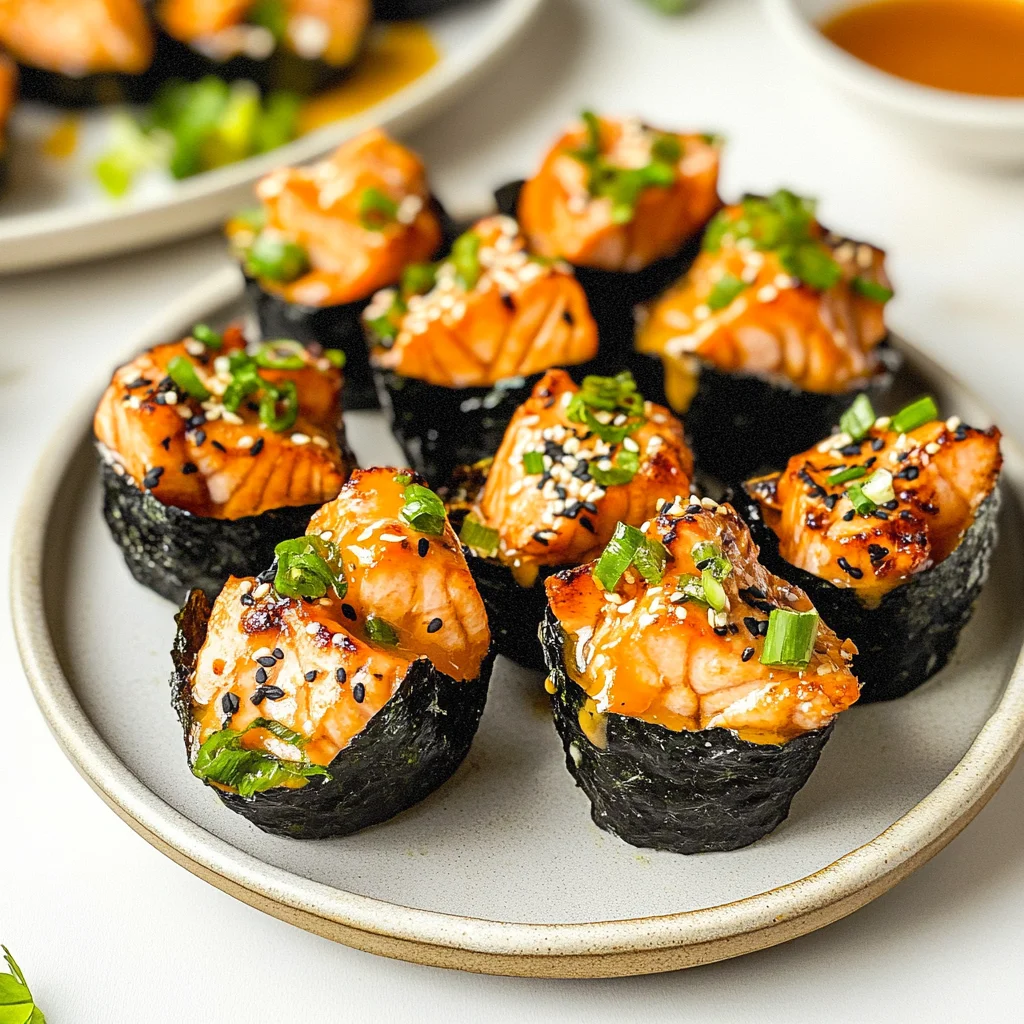
Imagine sinking your teeth into a crispy, golden cup filled with tender, flaky salmon, perfectly complemented by creamy avocado and a hint of tangy soy sauce. The aroma wafts through the air, inviting you to indulge in a dish that feels both comforting and gourmet—perfect for a cozy weeknight dinner or an impressive appetizer at your next gathering.
What sets these Easy Baked Salmon Sushi Cups (Viral Recipe) apart is their delightful combination of textures: the satisfying crunch of the baked wonton shell paired with the rich filling creates a symphony of flavors that dance on your palate. Drizzle with wasabi mayo or sprinkle with sesame seeds for an extra flourish, and you’ll find yourself sharing not just a meal, but an experience that brings everyone together.
Why You’ll Love This Easy Baked Salmon Sushi Cups
You’ll fall head over heels for these Easy Baked Salmon Sushi Cups not only because they are a brilliant fusion of flavors, but also due to their delightful texture contrast. The fluffy sushi rice mingles beautifully with the tender, savory salmon, enhanced by the rich cream cheese and a hint of sesame oil that adds depth to every bite. Topped with creamy avocado and zesty pickled ginger, these cups deliver an explosion of taste that dances on your palate. Plus, the ease of preparation makes them perfect for a quick weeknight meal or an impressive appetizer for guests—who could resist such deliciousness? Get ready to whip up these scrumptious sushi cups tonight!
What Kind of Salmon Should I Use?
For the Easy Baked Salmon Sushi Cups, it’s best to use skinless salmon fillet, preferably from a good-quality source like Atlantic or sockeye salmon. This variety works well due to its rich flavor and tender texture, which complement the sushi rice and other ingredients beautifully. Additionally, skinless fillets allow for even cooking and easy incorporation into the cups without any unwanted chewiness from the skin. If you only have salmon with the skin on, simply remove it before dicing; just be mindful that you may need to adjust your cooking time slightly to ensure the fish remains moist and succulent.
Ingredients for the Easy Baked Salmon Sushi Cups
Each ingredient in this dish plays an essential role in flavor and texture. Here’s what you’ll need:
1 cup sushi rice (uncooked): Provides a sticky base that holds the cups together.
1.5 cups water: Ensures the rice cooks to the perfect tender consistency.
1 tablespoon rice vinegar: Adds a subtle tanginess that enhances the flavor of the rice.
1 tablespoon sugar: Balances out the acidity of the vinegar for a harmonious taste.
1 teaspoon salt: Enhances all the flavors and brings everything together.
4 oz salmon fillet (skinless, diced): Offers a rich, buttery flavor and a satisfying protein source.
1 tablespoon soy sauce: Infuses umami depth and savory notes to the salmon.
1 teaspoon sesame oil: Adds a nutty aroma and richness that elevates each bite.
1 tablespoon green onion (chopped): Provides freshness and a mild onion flavor for brightness.
1 tablespoon cream cheese (softened): Contributes creaminess that melds beautifully with the salmon.
Step-by-Step: How to Make Easy Baked Salmon Sushi Cups

Perfect Results, Every Single Time! 🌡️
Never serve dry or undercooked food again. The Chef-X Digital Probe gives you an accurate temperature reading in under 3 seconds. It's the secret tool I use for perfect steaks, juicy chicken, and safe milk temperatures.

Rinse the Sushi Rice
Begin by rinsing the sushi rice under cold water until the water runs clear. This step is crucial as it removes excess starch, which can make the rice gummy. Once rinsed, drain the rice thoroughly to ensure even cooking.
Cook the Rice
In a saucepan, combine the rinsed sushi rice and 1.5 cups of water. Bring it to a boil over medium-high heat, then reduce the heat to low, cover, and let it simmer for 15 minutes. You’ll know it’s done when all the water has been absorbed and the rice is tender.
Let it Rest
Remove the saucepan from heat and let it sit covered for an additional 10 minutes. This resting period allows the rice to finish cooking in its own steam, resulting in a fluffy texture. Afterward, fluff the rice gently with a fork to separate the grains.
Season the Rice
In a small bowl, mix together 1 tablespoon of rice vinegar, 1 tablespoon of sugar, and 1 teaspoon of salt until dissolved. Fold this mixture into your fluffed sushi rice carefully so that all grains are evenly coated without mashing them.
Prepare the Salmon Filling
In a mixing bowl, combine 4 oz of diced salmon fillet, 1 tablespoon of soy sauce, 1 teaspoon of sesame oil, and 1 tablespoon of chopped green onion. Stir these ingredients together until well combined; you want the salmon to be evenly seasoned with a hint of brightness from the green onion.
Incorporate Cream Cheese
Gently fold in 1 tablespoon of softened cream cheese into your salmon mixture until fully blended. This adds creaminess and richness to your filling; make sure not to overmix as you want to maintain some texture in the salmon.
Preheat the Oven
While preparing your cups, preheat your oven to 350°F (175°C). This ensures that your sushi cups will bake evenly and thoroughly once assembled.
Form Sushi Rice Bases
Grease a muffin tin lightly with oil or cooking spray. Press a small amount of sushi rice into each cup firmly enough to form a base but not so hard that it becomes compacted. Aim for about one ounce per cup; this will allow for plenty of space for your salmon filling.
Fill with Salmon Mixture
Spoon your prepared salmon mixture generously on top of the rice pressed into each muffin cup. Ensure that each cup is filled evenly; this will help them cook uniformly and allow for delicious bites in every piece.
Bake Until Cooked Through
Place the muffin tin in your preheated oven and bake for 15-20 minutes. The sushi cups are done when the salmon appears opaque and flakes easily with a fork—this indicates that it has cooked through properly.
Cool Slightly
After baking, remove the muffin tin from the oven and let it cool slightly before attempting to remove your sushi cups. This resting time helps them set up a bit more so they hold their shape better when served.
Add Final Touches
Top each sushi cup with slices of avocado, pickled ginger, and wasabi if desired. These toppings add color and flavor; they’re also optional based on personal preference but enhance your presentation beautifully.
Serve Warm
Serve your baked salmon sushi cups warm for optimal flavor and texture. Enjoy this delightful fusion dish as an appetizer or quick meal that’s sure to impress!
How to Serve and Store Easy Baked Salmon Sushi Cups
These Easy Baked Salmon Sushi Cups yield four satisfying servings, making them perfect for a cozy dinner or a fun appetizer at your next gathering. Serve them warm on a colorful platter, garnished with sliced avocado, chopped green onions, and a side of pickled ginger for a fresh touch. Pair them with a light soy dipping sauce to enhance the flavors, and you’ll have a delightful dish that’s visually appealing and incredibly tasty.
To store leftovers, place the sushi cups in an airtight container in the refrigerator, where they will keep well for up to two days. When reheating, do so gently in the microwave on low power to prevent drying out the rice and overcooking the salmon; adding a splash of water can help maintain moisture. While these sushi cups are best enjoyed fresh, they do not freeze well, as the texture of the rice may change upon thawing.
Steamed Edamame
These tender and slightly salty soybeans provide a fresh, light contrast to the rich flavors of the salmon sushi cups.
Coconut Rice
The subtly sweet and creamy texture of coconut rice beautifully complements the savory notes of the baked salmon while adding an exotic twist.
Cucumber Salad
Crisp and refreshing, a cucumber salad with sesame dressing adds a delightful crunch and brightens the palate after each bite of sushi cup.
Garlic Naan
Soft and warm garlic naan serves as a perfect vessel for scooping up the salmon sushi cups, enhancing the meal with its aromatic flavor.
Roasted Brussels Sprouts
Caramelized Brussels sprouts offer a nutty depth that harmonizes with the umami of the salmon while providing a satisfying texture contrast.
Sweet Potato Fries
Crispy sweet potato fries bring a hint of sweetness and a satisfying crunch that balances out the creamy elements of the sushi cups.
Frequently Asked Questions
Can I use brown rice instead of sushi rice?
While brown rice can be used, it requires a longer cooking time and may not achieve the same sticky texture needed for sushi cups. If you choose to use brown rice, adjust the water and cooking time accordingly for best results.
Are these sushi cups gluten-free?
Yes, the Easy Baked Salmon Sushi Cups can be made gluten-free by using a gluten-free soy sauce alternative. Ensure that all other ingredients, including cream cheese and toppings, are also certified gluten-free.
Can I prepare the sushi cups in advance?
Absolutely! You can prepare the sushi rice and salmon filling ahead of time, then assemble and bake when you’re ready to serve. Just keep the components stored separately in the fridge until assembly.
How do I know when the salmon is cooked through?
The salmon is cooked when it reaches an internal temperature of 145°F (63°C) and is opaque throughout. Since it’s baked in the cups, check for flakiness to ensure it’s perfectly done.
What can I add for extra flavor or spice?
Feel free to incorporate additional spices or herbs like sriracha for heat or cilantro for freshness into the salmon mixture. You can also experiment with different toppings such as sliced radish or cucumber for added crunch.
One Last Thing
There’s something truly special about Easy Baked Salmon Sushi Cups that makes them a delightful addition to any meal or gathering—effortlessly delicious and sure to impress your guests. If you’re craving more sushi-inspired flavors, be sure to try our [Spicy Tuna Poke Bowl] or [Crispy Sushi Rolls] for additional culinary adventures. We’d love for you to save this recipe on Pinterest and share your sushi cups with our community; let’s inspire each other in the kitchen!
Easy Baked Salmon Sushi Cups
Ingredients
Method
- Rinse the sushi rice under cold water until the water runs clear.
- In a saucepan, combine the rinsed rice and water. Bring to a boil, then reduce heat to low, cover, and simmer for 15 minutes.
- Remove from heat and let it sit covered for 10 minutes. Fluff with a fork.
- Mix rice vinegar, sugar, and salt in a small bowl until dissolved, then fold into the rice.
- In a mixing bowl, combine diced salmon, soy sauce, sesame oil, and chopped green onion.
- Gently fold in the softened cream cheese until well mixed.
- Preheat the oven to 350°F (175°C).
- Grease a muffin tin and press a small amount of sushi rice into each cup to form a base.
- Spoon the salmon mixture on top of the rice in each cup.
- Bake in the preheated oven for 15-20 minutes until the salmon is cooked through.
- Let cool slightly before removing from the muffin tin.
- Top each sushi cup with avocado slices, pickled ginger, and wasabi if desired.
- Serve warm and enjoy!


Leave a Comment