

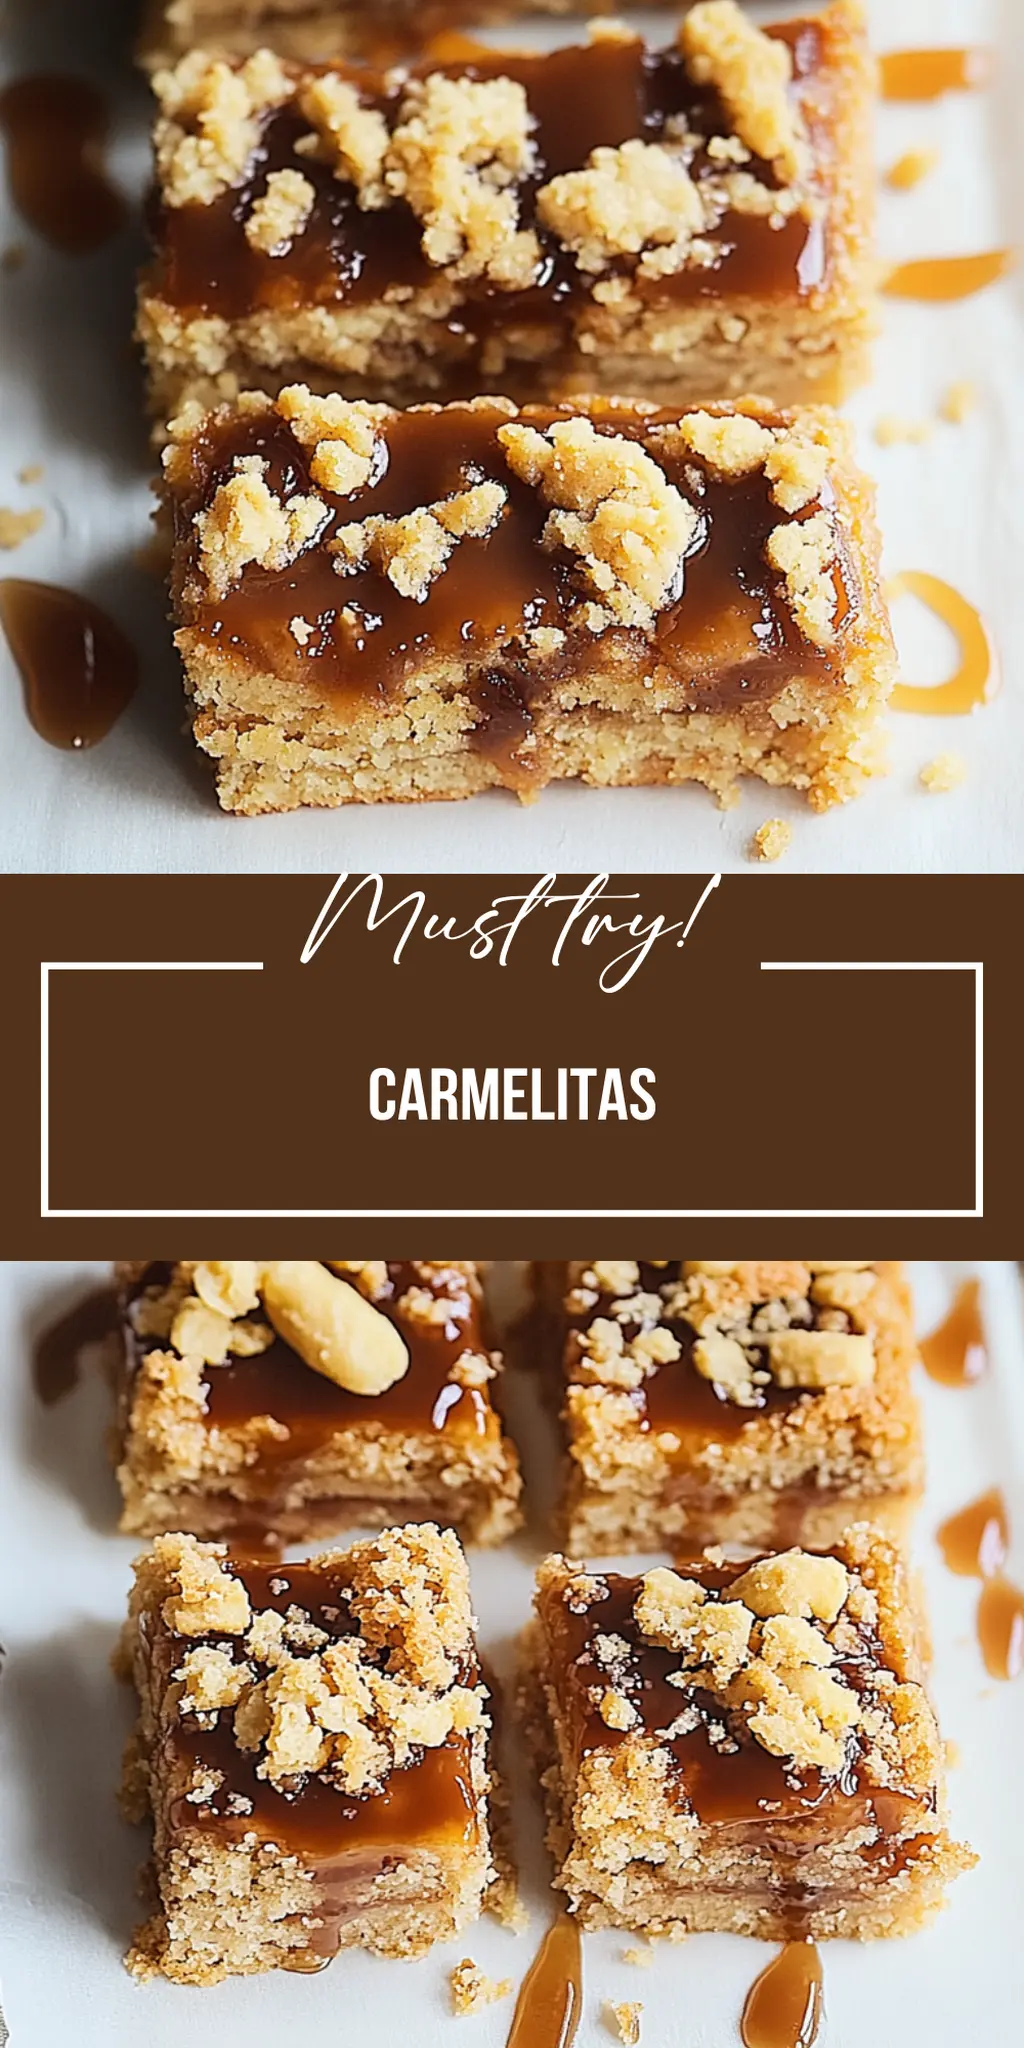
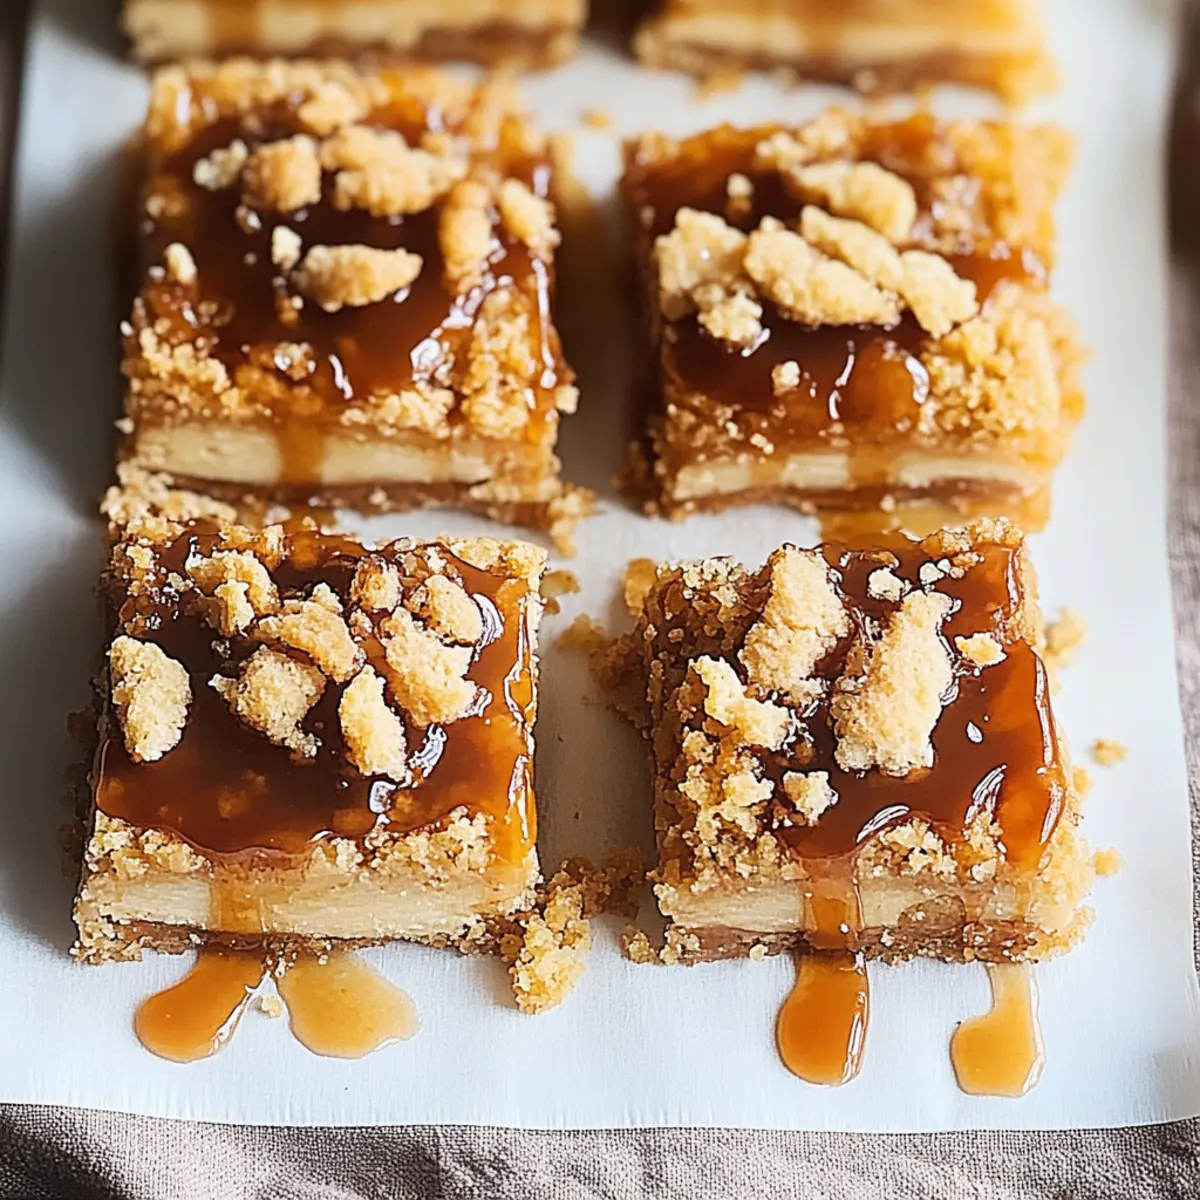
When you dive into the realm of desserts, there’s nothing quite like the sweet, gooey allure of Carmelitas. Picture layers of warm chocolate melted into a blanket of rolled oats and buttery goodness, smelling like a hug from your grandma’s kitchen. Carmelitas are not just a dessert; they’re an experience—a journey through indulgent flavors that dance on your palate.
But wait, there’s more! These delightful treats are perfect for any occasion—be it a family gathering, a cozy movie night, or just because you deserve a little sweetness in your life. With their chewy texture, creamy chocolate, and subtle hints of caramel, Carmelitas promise to leave you and your guests coming back for seconds (and maybe thirds).
Why You'll Love This Carmelitas
- This incredible Carmelitas transforms simple everyday ingredients into restaurant-quality flavors that will blow your mind completely.
- Foolproof recipe techniques guarantee perfect results every single time, making even novice cooks feel like professional chefs instantly.
- Stunning visual appeal with gorgeous colors and mouthwatering aromas creates the ultimate Instagram-worthy dish for any special occasion.
- Endlessly adaptable for different dietary needs while working beautifully for meal prep, date nights, or entertaining large groups effortlessly.
Ingredients for Carmelitas
Here’s what you’ll need to make this delicious Carmelitas:
1 cup old-fashioned oats – These oats give a delightful chewiness and rustic flavor that pairs perfectly with the rich filling.
1 cup all-purpose flour – The foundation of your crust and crumble, creating a buttery texture.
1 cup dark brown sugar – This sweetener adds that deep caramel note and a touch of moisture.
1/2 cup unsalted butter (softened) – Essential for binding everything together and infusing that creamy richness.
1 cup semi-sweet chocolate chips – Because what’s better than gooey chocolate melting into an irresistible treat?
1 can (14 oz) sweetened condensed milk – This magical ingredient transforms the chocolate into a creamy, dreamy layer of bliss.
1 tsp vanilla extract – A splash of vanilla enhances all the other flavors, giving the dessert a warm essence.
Pinch of sea salt – Just a dash to elevate the sweetness and balance the flavors beautifully.
How to Make Carmelitas
Follow these simple steps to prepare this delicious Carmelitas:
Step 1: Preheat Your Oven
Preheat the oven to 350°F (175°C) and grease an 8×8-inch baking pan with a touch of butter or cooking spray. This step ensures nothing sticks, and you can enjoy the bliss without any tragedy!
Step 2: Create the Base Layer
In a large bowl, combine the old-fashioned oats, all-purpose flour, dark brown sugar, and softened butter. Mix until crumbly. This mixture is going to be the base and the crumb topping, so make sure you don’t skimp on the mixing!
Step 3: Press the Mixture Into the Pan
Take half of the crumb mixture and press it firmly into the greased baking pan. This will create a sturdy, delicious foundation for all the chocolaty goodness that’s about to come.
Step 4: Add the Chocolate and Caramel Layer
Sprinkle the semi-sweet chocolate chips generously over the base. Next, warm the sweetened condensed milk gently in the microwave or on the stovetop and pour it evenly over the chocolate. It’s like a delicious wave of creamy magic!
Step 5: Crumble the Rest
Take the remaining crumb mixture and crumble it over the chocolate and caramel layers. This will create a crunchy top that perfectly complements the gooey filling.
Step 6: Bake to Perfection
Pop the pan into your preheated oven and bake for 25-30 minutes until golden brown on top. The aroma will fill your kitchen, and the anticipation will reach its peak!
Once baked, allow the Carmelitas to cool completely in the pan. Patience is a virtue here! When they are cool, carefully slice them into squares to reveal that decadent, gooey interior.
So, gather your loved ones around, serve these incredible Carmelitas, and watch as smiles spread across faces. With each bite, you’ll savor the sweet, buttery combination paired with melted chocolate and a hint of salt that’s simply irresistible.
Make sure to share (or not) and enjoy every moment of this delicious adventure in baking. Happy cooking!

Perfect Results, Every Single Time! 🌡️
Never serve dry or undercooked food again. The Chef-X Digital Probe gives you an accurate temperature reading in under 3 seconds. It's the secret tool I use for perfect steaks, juicy chicken, and safe milk temperatures.
This showstopping Carmelitas delivers restaurant-quality results using simple ingredients you probably already have at home. The perfect balance of textures and flavors creates an unforgettable dining experience that will have everyone asking for seconds. Picture-perfect presentation with vibrant colors makes this dish absolutely Instagram-worthy and guaranteed to impress any dinner guest. Incredibly versatile recipe that works beautifully for weeknight dinners, meal prep, special occasions, or even outdoor entertaining sessions.
Perfecting Carmelitas Cooking Process
For the best efficiency and results, prep your ingredients before starting. Mix the dry ingredients, press the base, layer your chocolate, pour the condensed milk, and then top with the crumble, all while preheating the oven.
Add Your Touch to Carmelitas
Feel free to customize your Carmelitas! Swap out the chocolate chips for white chocolate, add chopped nuts for crunch, or mix in some dried fruits like cranberries for an extra tart kick.
Storing & Reheating Carmelitas
Store leftover Carmelitas in an airtight container at room temperature for up to a week. To reheat, pop them in the microwave for a few seconds, or enjoy them chilled for a refreshing treat.
Chef's Helpful Tips for Carmelitas
- This professional-quality Carmelitas relies on precise timing and temperature control to achieve restaurant-standard results consistently.
- Master the art of mise en place by prepping all ingredients beforehand, ensuring smooth execution and preventing any last-minute cooking disasters.
- The secret lies in layering flavors throughout the cooking process rather than seasoning only at the end for maximum depth.
- Pro tip: let the finished dish rest for optimal texture and flavor development before serving to hungry guests waiting eagerly.
The first time I made Carmelitas for a family gathering, my uncle couldn’t resist stealing a piece before dinner. The smiles on everyone’s faces were priceless; it quickly became our family favorite!
FAQs About Carmelitas
What is Carmelitas?
Carmelitas are a delightful dessert bar that perfectly marry the goodness of oats with sweet, melty chocolate and rich, creamy sweetened condensed milk. These treats feature a crumbly, crunchy base made from oats and flour, layered with semi-sweet chocolate chips, and topped with a sprinkle of the same buttery oat mixture. This combination creates an irresistible bar that is chewy, sweet, and oh-so satisfying. Whether served warm from the oven or chilled for a refreshing treat, Carmelitas are sure to please any sweet tooth.
How do I make the best Carmelitas?
To create the best Carmelitas, focus on using quality ingredients and achieving just the right texture. Start by mixing the oats, flour, and sugars until crumbly, then make sure to press down the base firmly. Layer generously with chocolate chips and pour warmed sweetened condensed milk evenly over the top. It’s crucial to let them cool completely before slicing to ensure clean cuts and perfect squares. Patience is key; these delicious morsels are worth the wait!
Can I customize my Carmelitas?
Absolutely! One of the best things about Carmelitas is their versatility. You can easily swap out semi-sweet chocolate chips for white chocolate or even add nuts for that extra crunch. Consider folding in dried fruits like cranberries for a touch of tartness or experimenting with different types of chocolate. The flavors are limitless, allowing you to tailor each batch to suit your cravings or impress your guests.
How should I store leftover Carmelitas?
Leftover Carmelitas can be stored in an airtight container at room temperature for up to a week. If you want to keep them fresher for longer, you can also place them in the refrigerator. When ready to enjoy, simply reheat them in the microwave for a few seconds or serve chilled for a refreshing dessert. This ensures you can relish every last crumb of these delicious bars well beyond the first day of baking.
Conclusion for Carmelitas
Carmelitas are an irresistible dessert that brings together the perfect blend of flavors and textures. With a simple list of ingredients and easy preparation, you’ll find they quickly become a staple in your baking repertoire. From customizing with different chocolates to enjoying a warm square fresh from the oven, Carmelitas offer something for everyone. Don’t miss the opportunity to treat your family and friends with these delectable bars that will surely earn their praises.
Irresistible Carmelitas Recipe with Chocolate and Oats
Ingredients
Equipment
Method
- Preheat oven to 350°F (175°C) and grease an 8×8-inch baking pan.
- In a large bowl, mix oats, flour, brown sugar, and melted butter until crumbly. Press half into the pan as the base layer.
- Sprinkle chocolate chips over the crust, then pour warmed sweetened condensed milk evenly on top.
- Crumble the remaining oat mixture over the caramel layer and bake for 25-30 minutes until golden brown.
- Allow cooling completely before slicing into squares.

Leave a Comment