

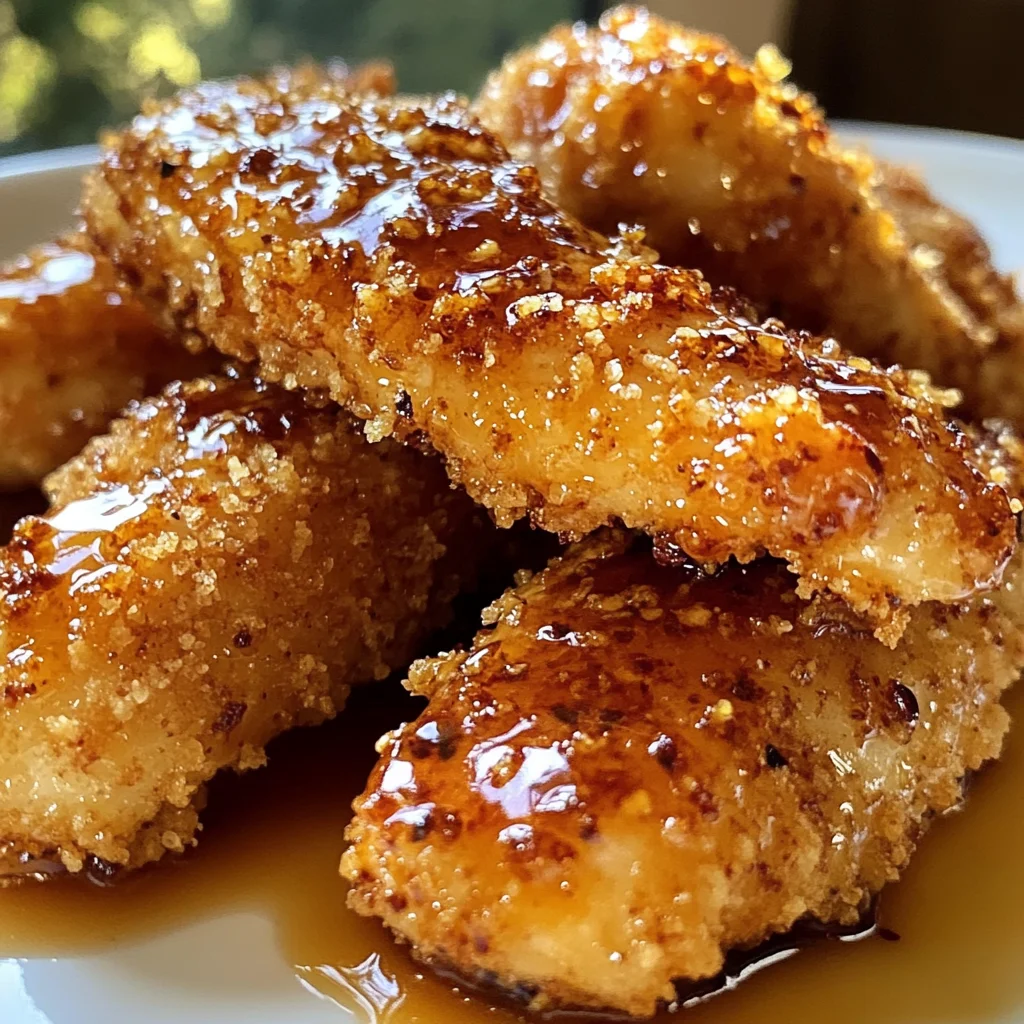
There’s something profoundly comforting about the aroma of freshly cooked chicken wafting through the kitchen, isn’t there? It’s like a warm hug from the inside out. Today, I’m beyond excited to share with you my recipe for Air Fryer Honey Butter Garlic Chicken Tenders. These tenders are not just food; they’re a delightful experience filled with flavors that dance on your palate. Imagine biting into a piece of perfectly crispy chicken, coated in a luscious honey garlic sauce that strikes that perfect balance between sweet and savory. It’s pure culinary magic, and I promise you, once you serve these to your family or friends, they’ll be asking for seconds—and maybe even thirds!
What I love most about these Air Fryer Honey Butter Garlic Chicken Tenders is that they embody everything I cherish in cooking: simplicity, comfort, and a hint of creativity. In just 22 minutes—yes, you read that right—you can transform humble chicken tenders into an extraordinary dish that’s both healthy and indulgent. The air fryer gives them that crunchy exterior we all crave while keeping the insides tender and juicy without drowning them in oil. Whether you’re preparing dinner for your family or whipping up something special for a gathering, these tenders are bound to steal the show.
The Irresistible Allure of Sweet and Salty
There’s something undeniably enticing about the combination of sweet and savory flavors. It’s like a beautiful symphony where each note complements the other, creating a harmony that resonates deeply with our taste buds. Honey has this wonderful ability to elevate dishes; it brings warmth and richness that make every bite feel like a celebration. In this recipe, honey is paired with garlic—a classic duo that adds depth and complexity to our chicken tenders. This interplay between sweetness and savoriness creates an experience that feels familiar yet excitingly new.
Not only are these tenders perfect for weeknight meals, but they also shine bright during gatherings or potlucks where good food is always the star of the show. Picture them served alongside refreshing salads or nestled in warm tortillas as part of a taco night; the possibilities are endless! And let’s not forget those dipping sauces—think tangy ranch or zesty honey mustard—that can take these tenders from delicious to absolutely unforgettable.
Air Fryer Honey Butter Garlic Chicken Tenders: Crispy Perfection Awaits
Now that we’ve set the stage for this culinary adventure, let’s dive into the details of making these scrumptious Air Fryer Honey Butter Garlic Chicken Tenders! You’re going to love how easy and rewarding this process is.

Perfect Results, Every Single Time! 🌡️
Never serve dry or undercooked food again. The Chef-X Digital Probe gives you an accurate temperature reading in under 3 seconds. It's the secret tool I use for perfect steaks, juicy chicken, and safe milk temperatures.
Ingredients:
To embark on this delicious journey, we need some key ingredients that will help us craft these lovely chicken tenders. Each one plays an essential role in creating the perfect dish.
- 1 lb chicken tenders: The star of our show! Chicken tenders are incredibly versatile; their smaller size means they cook quickly while remaining juicy on the inside. When selecting your chicken tenders, look for ones that are plump and have a nice pink hue without any blemishes. If you can’t find tenders specifically, feel free to use boneless skinless chicken breasts cut into strips—just keep an eye on cooking times as they may vary slightly.
- ¼ cup honey: This liquid gold is what gives our dish its signature sweetness! Honey not only enhances flavor but also helps create that irresistible sticky glaze when combined with butter and garlic. Opt for pure honey rather than processed varieties for maximum flavor impact. Remember to warm it slightly if it’s crystallized—it will blend better with other ingredients!
- 2 tbsp unsalted butter, melted: Butter adds richness and depth to our sauce while helping it cling beautifully to the chicken. The melting process releases those wonderful buttery flavors which harmonize with our sweet honey and robust garlic perfectly. If you prefer a lighter option, consider using coconut oil or olive oil instead; both will still provide delicious results.
- 3 cloves garlic, minced: Fresh garlic brings an aromatic touch that’s absolutely crucial here. Its pungent warmth balances out the sweetness of honey beautifully, resulting in layers of flavor that are simply mouthwatering! When chopping garlic, aim for finely minced pieces so they distribute evenly throughout your sauce—this ensures no single bite overpowers another.
- 1 tsp paprika: Not only does paprika add a lovely color dimension to our dish, but it also brings subtle smokiness which enhances flavor complexity without being overwhelming. Feel free to experiment with smoked paprika if you’re looking for an extra kick!
- 1 tsp salt: A pinch of salt heightens all those glorious flavors dancing around in your dish—it’s non-negotiable! Just be cautious not to oversalt; you can always adjust seasoning later after cooking if needed.
- ½ tsp black pepper: Freshly cracked black pepper adds warmth and a slight bite that rounds out our flavor profile beautifully. Trust me on this—freshly cracked pepper is worth it; it has so much more aroma than pre-ground varieties!
- 1 cup breadcrumbs (panko or regular): Breadcrumbs provide that satisfying crunch we all crave from fried foods but in a much healthier way thanks to air frying! Panko breadcrumbs give an extra crispy texture due to their larger size—if you prefer traditional breadcrumbs though, don’t hesitate to use them instead.
Equipment You’ll Need:
Having the right tools at your disposal makes cooking not only easier but also far more enjoyable! Each piece plays its part in crafting something truly wonderful—let’s explore what you’ll need:
- Air fryer: This miraculous gadget is essential for achieving that crispy texture without all the excess oil found in traditional frying methods. An air fryer circulates hot air around your food, creating a crunchy exterior while sealing moisture inside—a game-changer for tender chicken!
- Mixing bowls: You’ll want two good-sized mixing bowls—one for combining your sauce ingredients and another for tossing your chicken strips with half of this flavorful mixture before breading them. Having enough space allows everything to mix uniformly without making too much mess!
- Whisk: A simple whisk is invaluable when blending together sauces like our honey garlic mixture; it ensures everything incorporates smoothly without any lumps lingering behind.
- Cooking spray: A light coating of non-stick cooking spray is key when placing your breaded chicken tenders into the air fryer basket—this prevents sticking while ensuring even browning across every tender!
Now that we’ve explored our ingredients and equipment thoroughly let’s get into preparing these delectable Air Fryer Honey Butter Garlic Chicken Tenders—the moment we’ve all been waiting for!
Step 1: Whisk Together Your Sauce
Start by grabbing a small bowl and whisking together the honey, melted butter, minced garlic, paprika, salt, and black pepper until they form a beautiful cohesive mixture—the aroma should be utterly intoxicating! This step is crucial as it melds together flavors perfectly before marinating our chicken tenders in it later on; don’t rush this step! Once combined completely (you should see no unmixed butter clumps), set half aside for drizzling later on.
Step 2: Coat Your Chicken Tenders
In a larger bowl now filled with half of your prepared sauce mixture (the rest will come later!), toss those lovely chicken tenders until they’re generously coated through every crevice—you want each piece enveloped in all those amazing flavors! Make sure each tender gets ample attention; think about how satisfying it’ll be when you take your first bite into such well-seasoned meat! Let them sit there soaking up those flavors while we prepare their crunchy armor next.
Step 3: Dredge in Breadcrumbs
Once those beauties have marinated nicely (even just five minutes makes such a difference!), grab some breadcrumbs—panko or regular works wonders here—and pour them onto a plate or shallow dish large enough for easy dredging action ahead! Take each tender one at a time now; press firmly into breadcrumbs until fully covered then place them back onto another plate ready-to-go into our awaiting air fryer basket shortly after—they should look golden even before hitting heat!
Step 4: Preheat Your Air Fryer
While you’re assembling everything else above seamlessly together—the next essential step involves preheating that trusty air fryer at 400°F (200°C) around five minutes before cooking begins officially! This ensures optimal temperature when placing those nuggets inside so they crisp up beautifully rather than steaming away—which would leave us sadly disappointed instead—we want crunchy delight! Keep an eye on it during preheating too; some models take longer than others depending on wattage levels involved (small details matter!).
Stay tuned as we’ll continue diving deep into creating this masterpiece together soon enough—trust me when I say it’s worth every moment spent crafting such heavenly bites ahead!
Cooking Your Air Fryer Honey Butter Garlic Chicken Tenders to Perfection
Step 5: Preheating the Air Fryer – Setting the Stage for Crispy Goodness
Now, let’s move on to preheating your air fryer. This step is absolutely paramount because a properly preheated air fryer ensures that your chicken tenders cook evenly and achieve that delightful golden-brown crispiness that we all adore. It’s like giving your tenders a warm welcome into a hot, cozy environment where they can transform from raw to beautifully cooked in just minutes! To preheat, set your air fryer to 400°F (200°C) and let it run for about 5 minutes. You’ll know it’s ready when you can feel the warmth radiating from the basket when you open it. Trust me; this little extra effort makes all the difference in texture. The high heat will create a beautiful crust while keeping the inside juicy and tender—a true symphony of flavors waiting to unfold!
While you’re waiting for this magical moment, take a minute to reflect on how wonderful it is that air fryers allow us to enjoy crispy foods with significantly less oil. This means we can savor each bite without any of that heavy feeling often associated with fried foods. Plus, cleaning up after is much easier! As you preheat, visualize those chicken tenders cooking away, crisping up perfectly as they await their flavorful honey garlic glaze.
Step 6: Arranging the Chicken Tenders – The Art of Placement
Once your air fryer is preheated and ready to go, it’s time to arrange those beautifully breaded chicken tenders in the basket. This part might seem simple, but believe me when I say that how you place them can dramatically affect how they cook. Lay them out in a single layer, ensuring there’s enough space between each tender for hot air to circulate freely around them. If they’re too crowded, they’ll steam rather than fry, which leads to soggy results instead of the crunchy perfection we’re aiming for.
You might have to cook in batches depending on how large your air fryer is—it’s totally worth it! By allowing each piece its own space, you ensure that every tender gets its fair share of that heavenly hot air. When you pop them in, take a moment to admire your handiwork; these golden nuggets are about to become something truly extraordinary! Remember also that cooking times may vary slightly based on your specific model; keep an eye on them towards the end of the cooking time.
Step 7: Cooking Time – The Crunch Factor
Now comes the exciting part—cooking those tenders! Set your timer for about 10-12 minutes and take a deep breath; deliciousness awaits! Halfway through this magic time frame, give those tenders a gentle flip using tongs or a fork. Flipping allows both sides to bask equally in the hot air and ensures even browning all around. It’s essential not just for aesthetics but also for texture because you want every bite of these Air Fryer Honey Butter Garlic Chicken Tenders to be as crispy as possible.
When you reach that glorious mark of 10-12 minutes, grab a meat thermometer if you’ve got one handy—it’s an excellent tool for checking doneness while ensuring safety and juiciness inside. You’re looking for an internal temperature of 165°F (74°C). If you don’t have a thermometer nearby, simply cut one open at its thickest part; it should be opaque and juices should run clear—not pink or cloudy! I promise you; once they’re done cooking and you’ve flipped them halfway through correctly, you’re going to be left with enticingly crispy chicken tenders that beckon with their mouthwatering aroma!
Step 8: Drizzling That Irresistible Honey Garlic Mixture – A Sweet Finish
Now let’s talk about finishing touches because this is where those chicken tenders transform from merely delicious to utterly intoxicating! As soon as they come out of the air fryer—golden brown and tempting—you’ll want to drizzle over the remaining honey garlic mixture that you set aside earlier. This step not only adds an additional layer of flavor but also gives each tender a glossy sheen that’s simply irresistible. Picture this: as you drizzle this liquid gold over your chicken tenders, think of how those sweet and savory notes meld together beautifully.
Make sure each piece gets some love from this luscious sauce; use a spoon or brush if you’d like more control over distribution. The warmth from the freshly cooked tenders will cause the honey mixture to seep into every nook and cranny, enhancing their flavor profile beyond belief. You’ll find yourself captivated by the smell—the rich aroma wafting through your kitchen will make everyone wonder what magic is happening behind closed doors! Let those saucy beauties sit for just a minute before serving—this resting time allows flavors to settle and intensify further.
Final Touches – Serving Up Your Masterpiece
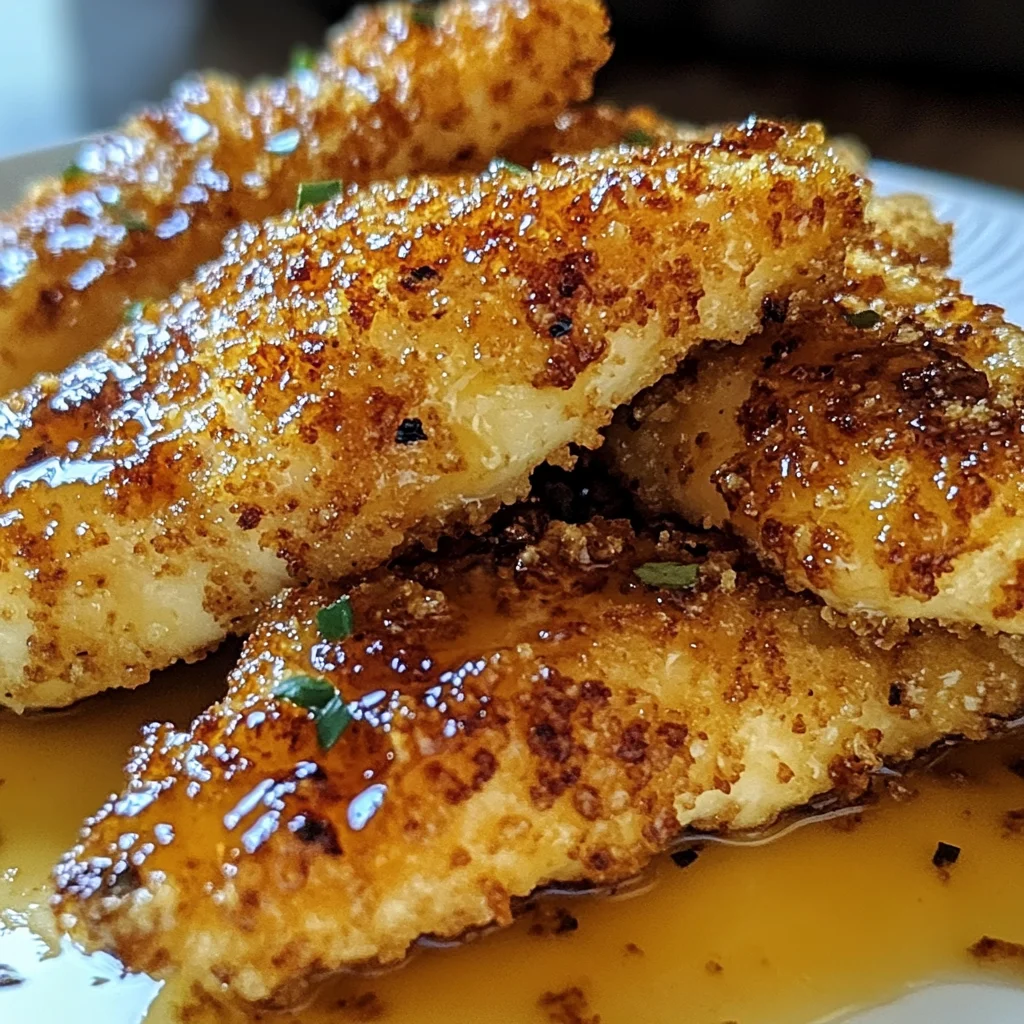
Step 9: Presenting Your Air Fryer Honey Butter Garlic Chicken Tenders
At long last, it’s time for one of my favorite moments—the grand reveal! Carefully transfer those succulent Air Fryer Honey Butter Garlic Chicken Tenders onto an inviting serving platter or individual plates. You might want to sprinkle some fresh herbs like parsley or chives over them for an added touch of color and freshness—it really elevates presentation while bringing a bright contrast against those golden tenders. If you’re feeling adventurous or want an extra kick, consider serving them alongside an array of dipping sauces such as ranch dressing or zesty honey mustard; these can add another dimension of flavor that complements our dish perfectly!
As you serve these delightful morsels at your next family meal or gathering with friends, I promise you’ll see eyes light up with anticipation. Get ready for compliments—a lot of them—because these chicken tenders are not just food; they are tiny bites of joy wrapped up in comfort! Enjoying these together becomes more than just sharing a meal; it’s creating memories filled with laughter and connection around the table—a truly extraordinary experience.
So there you have it—your very own recipe for Air Fryer Honey Butter Garlic Chicken Tenders! I hope you feel as excited making these at home as I do sharing this cherished recipe with you today. Happy cooking!
Storage and Enjoyment Tips for Your Air Fryer Honey Butter Garlic Chicken Tenders
Now that you’ve crafted these delightful Air Fryer Honey Butter Garlic Chicken Tenders, it’s time to celebrate the joy of sharing them with loved ones! Picture yourself setting a beautiful table, the aroma wafting through the air, making everyone’s mouths water in anticipation. But what if you have leftovers? Fear not, dear friend; I’ve got you covered with some handy tips to store and enjoy these crispy morsels even after the initial feast.
Storing Leftover Air Fryer Honey Butter Garlic Chicken Tenders
To keep your Air Fryer Honey Butter Garlic Chicken Tenders tasting as fresh and delicious as the day you made them, you’ll want to use an airtight container for storage. Glass containers are my personal favorite because they maintain quality without any plastic taste seeping in. Just pop those tenders in there and seal it tight! They’ll last about 3-4 days in the refrigerator, but trust me, you’ll want to savor every bite before they disappear. One nifty trick I’ve learned over time is to place a slice of bread in the container; it helps absorb excess moisture and keeps your chicken tenders crispy for longer. I promise you, this simple addition makes all the difference! When you’re ready to indulge again, just reheat them in your air fryer or oven until they’re warmed through and crispy once more—no one will even know they were leftovers!
Freezing Air Fryer Honey Butter Garlic Chicken Tenders for Later
If you find yourself with an abundance of these irresistible tenders—or if you simply want to prepare for future cravings—you can freeze them! Start by arranging the cooked chicken tenders on a baking sheet lined with parchment paper and freeze them for about an hour. This will make sure they don’t stick together when stored. Once frozen solid, transfer them into a freezer-safe bag or container, squeezing out as much air as possible. They’ll stay good for up to 2-3 months! Freezing is such a fabulous option because it means you can whip up a quick meal by pulling out just what you need whenever hunger strikes. Imagine coming home after a long day and knowing that you have these flavorful nuggets waiting for you in the freezer—how convenient is that?
With these storage tips in your back pocket, you’re well-equipped to enjoy every last bite of your scrumptious Air Fryer Honey Butter Garlic Chicken Tenders!
Conclusion:
As we wrap up our delightful journey through this recipe, I can’t help but feel a wave of excitement wash over me—this dish truly embodies comfort food at its finest. The beautiful melding of sweet honey and savory garlic creates a flavor profile that dances on your palate like a warm hug from an old friend. Each tender piece has that perfect crunch from the breadcrumbs while remaining juicy on the inside, making every bite profoundly satisfying. What’s not to love about a meal that brings smiles around the table and flavors that elevate it beyond mere dinner fare?
I wholeheartedly believe that this recipe is an absolute must-try—not just because of how delicious it is but also due to the joy it brings during preparation. Whether you’re cooking for family game night or hosting friends for an impromptu gathering, these tender bites are sure to steal the spotlight. Picture this: as you pull them from your air fryer, steam rising gently while their golden-brown crust glistens under soft lighting; it’s pure culinary magic! The anticipation builds as everyone gathers around—what could be better than sharing food made with love?
When it comes to serving suggestions, let your imagination run wild! Imagine savoring one with a zesty ranch dip or perhaps nestling a few atop a fresh salad drizzled with tangy vinaigrette; each combination enhances those symphonic flavors beautifully. For an afternoon pick-me-up, pair them with crispy sweet potato fries or crunchy veggie sticks; it’s like creating your own mini feast! And if you’re feeling adventurous for dessert afterward—a slice of fruit tart would be divine!
Feeling inspired yet? This recipe is wonderfully adaptable too! Why not try adding some heat with crushed red pepper flakes or experimenting with different herbs like rosemary or thyme? You could even switch up the breadcrumbs—think about using crushed nuts for added crunch or even seasoned cornflakes for that extra layer of flavor! It’s all about making this dish resonate with your personal taste while bringing joy to those around you. So go ahead, give this recipe a whirl, share your experience with loved ones, and let’s connect over our shared passion for cooking delicious meals together!
Air Fryer Honey Butter Garlic Chicken Tenders
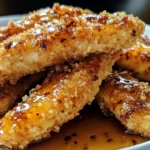
Indulge in Air Fryer Honey Butter Garlic Chicken Tenders—crispy, tender delights bursting with flavor. Try this easy recipe today!
- Prep Time: 10 minutes
- Cook Time: 12 minutes
- Total Time: 22 minutes
- Yield: Serves approximately 4 people 1x
- Category: Dinner
- Method: Frying
- Cuisine: American
Ingredients
- 1 lb chicken tenders
- ¼ cup honey
- 2 tbsp unsalted butter, melted (or olive oil)
- 3 cloves garlic, minced
- 1 tsp paprika
- 1 tsp salt
- ½ tsp black pepper
- 1 cup breadcrumbs (panko or regular)
Instructions
- Preheat air fryer to 400°F (200°C).
- In a bowl, whisk together honey, melted butter, minced garlic, paprika, salt, and black pepper.
- Toss chicken tenders in half of the sauce mixture until fully coated.
- Dredge each tender in breadcrumbs until covered.
- Arrange tenders in a single layer in the air fryer basket and cook for 10-12 minutes, flipping halfway through.
- Drizzle remaining sauce over cooked tenders before serving.
Nutrition
- Serving Size: 3 chicken tenders (78g)
- Calories: 280
- Sugar: 9g
- Sodium: 580mg
- Fat: 12g
- Saturated Fat: 5g
- Unsaturated Fat: 7g
- Trans Fat: 0g
- Carbohydrates: 26g
- Fiber: 1g
- Protein: 21g
- Cholesterol: 75mg


Leave a Comment