

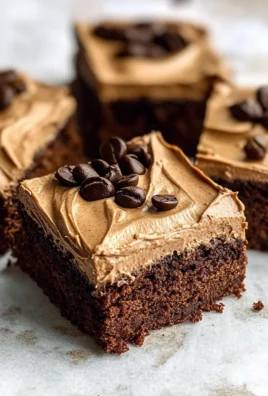
There’s something profoundly enchanting about the aroma of freshly baked goods wafting through the air, isn’t there? It’s like a warm hug that wraps itself around you, inviting you to pause and indulge in a moment of sweetness. Today, I want to share with you a recipe that embodies this warmth and joy—the Double-Chocolate Holiday Cookie Dough Brownie Gems. This treat is not just your average dessert; it’s a delightful union of rich, chocolatey brownie base topped with an irresistible edible cookie dough layer. With each bite, you’ll experience a symphony of flavors that dances on your palate, making it the perfect indulgence for the holiday season or any occasion that calls for a sweet touch.
I’ve always been captivated by desserts that manage to evoke nostalgia while introducing delightful new twists. These Double-Chocolate Holiday Cookie Dough Brownie Gems do exactly that! They bridge the gap between traditional brownie decadence and the playful joy of cookie dough—an irresistible combination if there ever was one. Imagine sinking your teeth into a fudgy brownie that melts in your mouth, only to discover a creamy cookie dough surprise waiting inside. It’s truly extraordinary! Trust me when I say that once you bake these gems, they’ll become a beloved staple in your kitchen—just like they have in mine.
Double-Chocolate Holiday Cookie Dough Brownie Gems: A Match Made in Dessert Heaven
These delectable treats are more than just cookies or brownies; they are an experience—a chance to create lasting memories with loved ones as you share stories over baking together. The rich chocolate flavors combined with the smoothness of cookie dough create an indulgent treat that’s perfect for sharing (or not!). So roll up your sleeves and get ready, because we’re about to embark on a culinary adventure that will leave your taste buds singing!
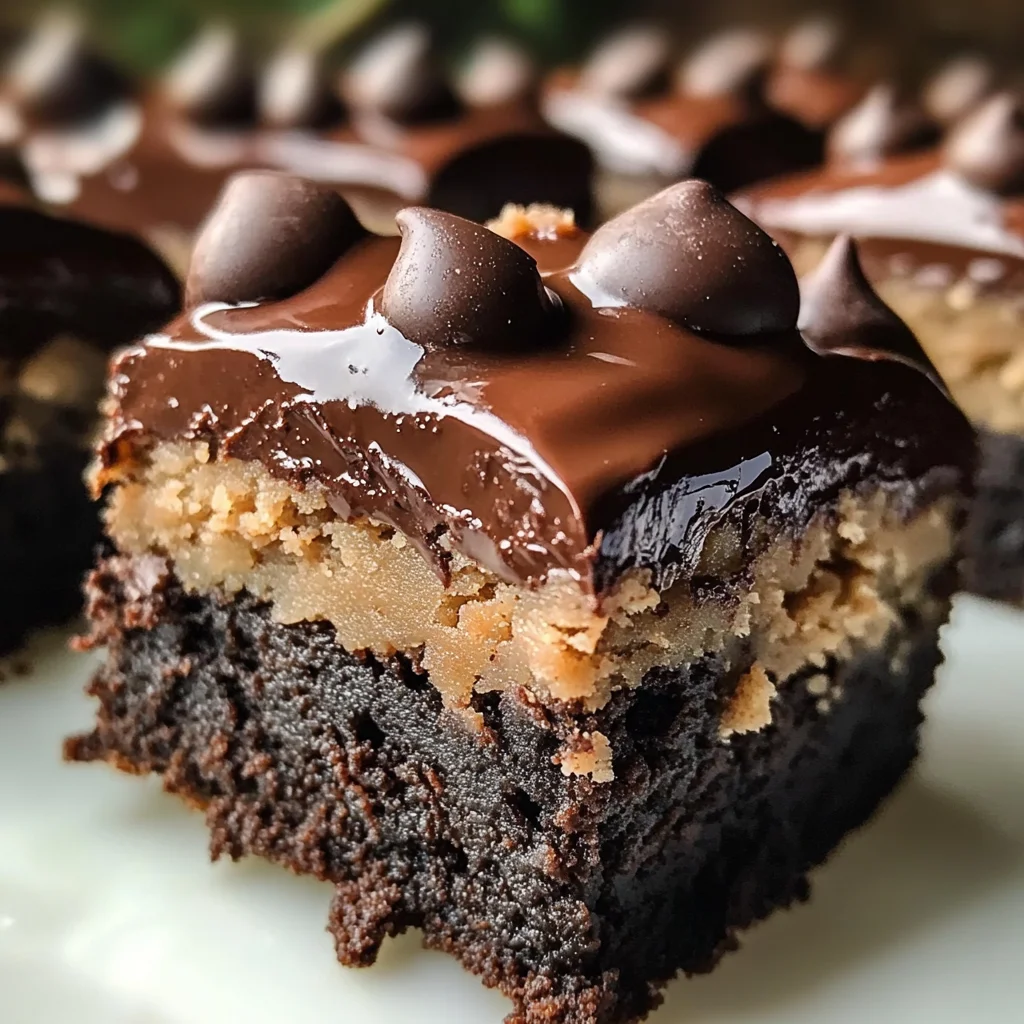
Ingredients:
As we begin our journey into the world of double-chocolate holiday delight, let’s take a moment to appreciate each ingredient we’ll be using. Each one plays its own unique role in crafting these gorgeous gems!
For the Brownie Base:
- 1 cup (2 sticks or 226g) unsalted butter, melted. This liquid gold is paramount for achieving that ultra-rich flavor and moist texture in our brownies. Using unsalted butter allows us to control the salt levels in our recipe. Make sure it’s melted but not bubbling; otherwise, it could cook our eggs when mixed in—yikes! If you’re looking for alternatives, coconut oil can work beautifully here, imparting its own subtle flavor.
- 1 cup (200g) granulated sugar. This sweetener is fundamental not just for sweetness but also for creating that delightful crust on top of our brownies. The sugar caramelizes during baking, giving us those lovely edges that contrast beautifully with the soft center. If you’re feeling adventurous, brown sugar could also be used here for added depth and moisture.
- 2 large eggs. Eggs are essential for binding all our ingredients together while adding richness and moisture to our batter. They help create structure as they coagulate during baking—ensuring our brownies hold their shape without being too dry or crumbly. Make sure your eggs are at room temperature so they incorporate smoothly!
- 1 teaspoon vanilla extract. Oh, how I adore vanilla! It’s like the secret handshake among ingredients—it enhances everything it touches! Using pure vanilla extract is non-negotiable here; its complexity adds warmth and depth to our brownie base that imitation vanilla simply cannot replicate.
- 1 cup (85g) cocoa powder. This is where we really up the ante on chocolate flavor! Cocoa powder brings both intensity and richness to our brownies without adding excess fat. Look for high-quality Dutch-process cocoa powder if you want an even smoother flavor profile—it transforms every bite into pure bliss.
- 1 cup (125g) all-purpose flour. Flour provides structure; it’s what holds everything together and gives our brownies their signature chewiness. Be careful not to overmeasure it—spooning it into your measuring cup instead of scooping will prevent dense brownies.
- ½ teaspoon salt. Salt is crucial as it elevates all the flavors; don’t skip this step! Just a pinch balances out the sweetness and enhances the chocolate’s richness beautifully.
- ½ teaspoon baking powder. Baking powder acts as our leavening agent here; it helps create those lovely soft centers by introducing air into our batter as it bakes! Make sure it’s fresh; old baking powder won’t give us the lift we need!
For the Edible Cookie Dough Layer:
- ½ cup (1 stick or 113g) unsalted butter, softened. Softened butter is essential for achieving that creamy consistency we want in our cookie dough layer—it helps create that dreamy texture when mixed with sugars. Remember: this isn’t melted butter—we want it soft enough to hold its shape while still being pliable.
- ¾ cup (150g) brown sugar. Brown sugar adds moisture and an irresistible chewiness thanks to its molasses content—it’s what makes cookie dough so comforting! If you prefer a lighter taste, feel free to substitute half with granulated sugar for balance.
- 2 tablespoons milk. Milk brings everything together while contributing moisture—that comforting creaminess we crave in cookie dough! Use whole milk for richness or almond milk if you’re looking for a dairy-free option.
- 1 teaspoon vanilla extract (yes again!). Just like before, this magical ingredient enhances flavors throughout our edible cookie dough layer too!
- 1 cup heat-treated all-purpose flour. You read that right—heat-treated flour ensures safety since we’re eating this raw! To do this at home, spread flour on a baking sheet and bake at 350°F (175°C) for about 5 minutes until slightly golden—let cool before using!
Now that we’ve gathered all these wonderful ingredients together let’s move forward and talk about how we’ll bring these fabulous Double-Chocolate Holiday Cookie Dough Brownie Gems to life!
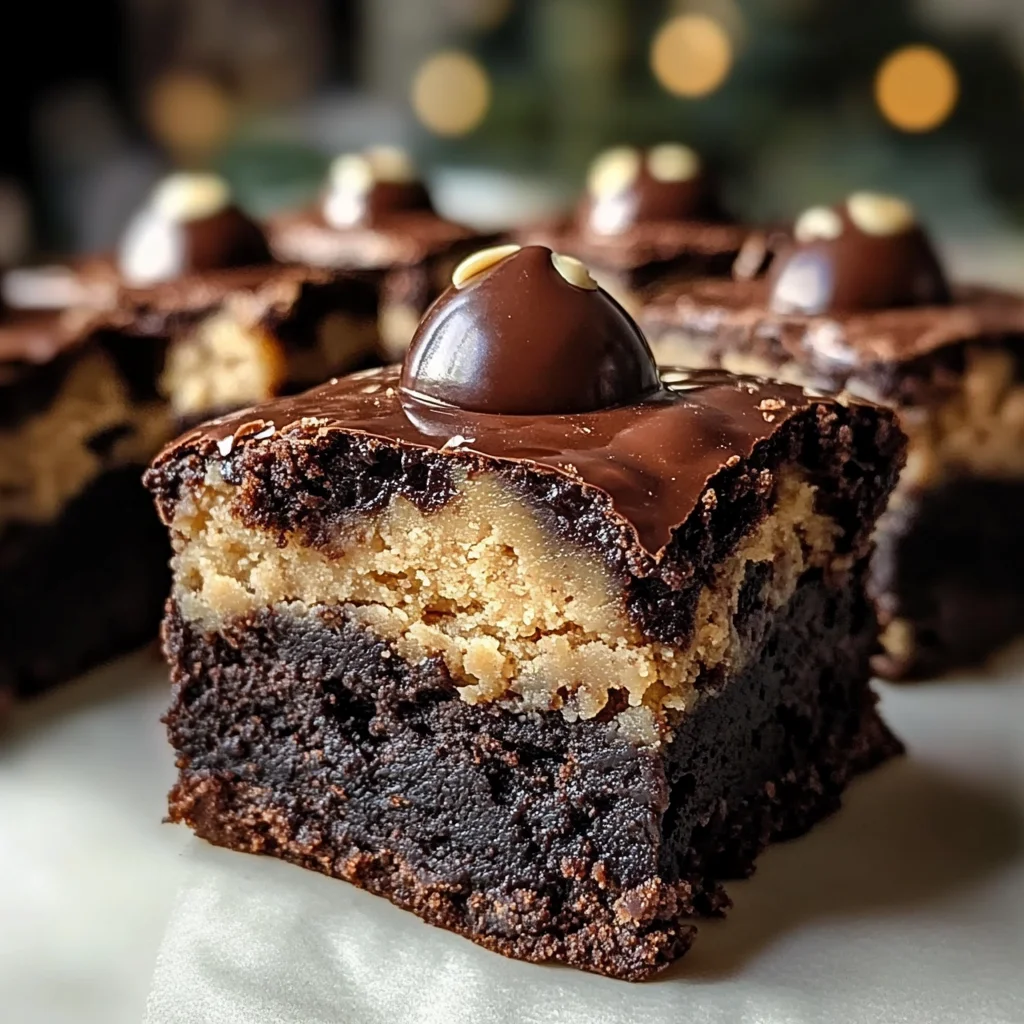
Equipment You’ll Need:
Before diving into mixing and baking, let’s chat about some essential tools that’ll make this process smooth sailing—trust me; having these handy will elevate your experience immensely!
- Mixing bowls – A set of various sizes will be indispensable as we’ll be mixing different components separately before combining them later on!
- Electric mixer or whisk – An electric mixer makes creaming butter and sugar effortless while ensuring everything combines uniformly—you’ll thank yourself later! If you opt for whisking by hand instead, prepare for an arm workout but know it’s totally doable!
- Rubber spatula – Perfect for scraping down sides of bowls so nothing gets left behind—this little tool ensures every ounce of goodness gets mixed well!
- 9×9 inch baking pan – A square pan works wonders here—it provides adequate height allowing those luscious layers we’re after without spilling over during baking time!
Now we’re equipped with knowledge about ingredients and tools—we’re ready to jump into preparing those heavenly Double-Chocolate Holiday Cookie Dough Brownie Gems! Are you excited? I know I am!
Step 1: Whisk Together Your Brownie Base
Start by preheating your oven to 350°F (175°C). This step is crucial because we want everything warmed up and ready when we’re prepared to pop those brownies in! In one of your mixing bowls, combine the melted unsalted butter with granulated sugar using either an electric mixer or whisk until it’s nice and creamy—which should take about two minutes. This process is known as creaming: incorporating air into your mixture creates volume which results in beautifully soft brownies later on.
Next up are those two eggs: add them one at a time while continuing to mix until well combined—this emulsifies everything beautifully! Then toss in your vanilla extract like confetti at a celebration—it brings such warmth and depth into our batter! Now onto folding in dry ingredients: sift together cocoa powder, flour, salt & baking powder just until there are no dry pockets left; don’t rush this step because overmixing can lead us down the path towards tough brownies—and nobody wants that!
Step 2: Bake That Divine Base
Once you’ve got your brownie batter all mixed up nicely, pour it carefully into your prepared baking pan using your rubber spatula to spread evenly across—this ensures optimal cooking throughout each bite! Pop this beauty into preheated oven for around 25–30 minutes or until testing with toothpick reveals moist crumbs clinging rather than wet batter—this visual cue indicates perfection has been achieved! Remember: slightly underbaking is better than overbaking since residual heat will continue cooking them post-removal from oven.
While those brown beauties cool down completely on wire rack nearby—a crucial step since warm brownies will melt any subsequent layers—we’ll turn our attention towards creating that edible cookie dough layer next… How exciting does this sound?
Step 3: Prepare Your Edible Cookie Dough Layer
In another mixing bowl (you lucky duck!), beat together softened unsalted butter along with brown sugar until light & fluffy—that should take around two minutes again! The texture should resemble whipped cream clouds floating above—you’ll know you’ve nailed it when light golden swirls fill every corner of bowl effortlessly blending together seamlessly… Oh my heart skips just thinking about it!
Now add in milk followed by vanilla extract once again mixing thoroughly till incorporated fully—and trust me here; no need worrying about raw eggs ruining anything because we’re keeping things safe & scrumptious using heat-treated flour instead which allows us guiltlessly indulging straight from bowl afterward… Can anyone else hear angels singing right now?!
Continuing onward gently fold-in heat-treated flour until mixed well but remember not overstirring here either since nobody likes tough cookies… Finally add optional chocolate chips if desired—they bring extra joyfulness within each bite making holidays even merrier ahead!!
Step 4: Assemble Those Heavenly Layers
Now comes one last glorious part before diving headfirst into deliciousness… Take cooled brownie base from earlier & spread dollops atop evenly distributing edible cookie dough across entire surface area generously covering every inch below leaving no room behind unfulfilled cravings whatsoever!! Use spatula again smoothing edges out ever so delicately trying not disturb bottom treasure hidden underneath too much…
Pop back into oven briefly at same temperature allowing layers meld together perfectly forming harmonious balance between textures—we’re talking gooey fudge-y goodness meets chewy crunchy delights here folks!!! Let bake another 8–10 minutes max just enough time allow edges turning golden brown while ensuring centers remain soft still—and voilà!! The magic unfolds before eyes revealing stunning masterpiece fit serve guests proudly alongside cups steaming hot cocoa nearby!!
With patience finally rewarded allow resting period post-baking letting settle before slicing squares proudly presenting creations made from scratch showcasing love poured throughout entire process ahead…
Are you feeling inspired yet? I promise you these Double-Chocolate Holiday Cookie Dough Brownie Gems will steal hearts wherever they go—so go ahead gather friends around kitchen table & enjoy creating flavorful moments worth cherishing forevermore… Happy Baking!!
The Joy of Baking: Crafting Your Double-Chocolate Holiday Cookie Dough Brownie Gems
Step 5: The Alluring Brownie Base
Now that we’ve got our ingredients prepped and ready, it’s time to create the foundation of our dreamy Double-Chocolate Holiday Cookie Dough Brownie Gems. Begin by pouring your melted butter into a mixing bowl. There’s something truly mesmerizing about watching the liquid gold swirl in, mingling with the granulated sugar. This step is not just about combining ingredients; it’s where the magic begins. The warmth of the melted butter dissolves the sugar, creating a rich, sweet base that will lend an incredible depth of flavor to your brownies. Using a whisk or electric mixer, blend these two together until they form a smooth mixture that resembles a glossy caramel.
Next, add in the eggs one at a time, incorporating them fully before adding the next. You’ll notice how these eggy treasures transform your mixture from thick to luscious! This is crucial because eggs play an essential role in binding your brownie batter while providing moisture—think of them as the glue that holds this heavenly creation together. Once you’ve added both eggs and they’re well blended, it’s time to introduce that delightful teaspoon of vanilla extract. The aroma will waft through your kitchen, filling it with warmth and nostalgia. Trust me on this—vanilla is not just an ingredient; it’s an experience!
Now comes the fun part—sifting in your cocoa powder, flour, salt, and baking powder! Sifting helps break up any lumps and aerates the mixture, which results in a lighter brownie texture that melts in your mouth. Gently fold these dry ingredients into your wet mixture using a spatula or wooden spoon. Be careful not to overmix; you want to combine everything just until you can’t see any dry flour—it’s okay if there are a few lumps! Overmixing can lead to dense brownies rather than the tender bites we’re aiming for. Once combined, set this brownie batter aside as we prepare for the edible cookie dough layer.
Step 6: Creating Irresistible Edible Cookie Dough
With our brownie base resting beautifully, let’s dive into making that enticing edible cookie dough layer—a step that truly elevates our Double-Chocolate Holiday Cookie Dough Brownie Gems to legendary status! Start by creaming together softened unsalted butter and brown sugar in a mixing bowl until fluffy and well combined. You might be tempted to skip this step and rush through—it might seem like just mixing—but this creaming process is absolutely paramount for achieving that wonderfully soft cookie dough texture we all crave. As you whisk away, allow yourself to take in the sweet scent wafting from the bowl; it’s like holiday cheer coming alive!
Once you achieve that fluffy consistency—where lightness dances within your mix—add two tablespoons of milk and one teaspoon of vanilla extract. Mix again until smooth; this addition enhances both creaminess and flavor while also ensuring our cookie dough stays moist without being overly gooey or sticky—a fine balance indeed! Now here comes my favorite part: gently fold in one cup of heat-treated all-purpose flour. If you’re wondering why we heat-treat our flour instead of using it raw, it’s simple yet essential: heating flour eliminates any potential harmful bacteria while giving us peace of mind when enjoying raw cookie dough.
As you incorporate the flour into your mixture, I encourage you to savor every moment—the smell alone is intoxicating! You want it to form a cohesive but still somewhat thick dough that holds its shape when scooped. If you’re feeling adventurous (and I know you are!), consider folding in some mini chocolate chips at this point for an extra burst of chocolatey goodness! This cookie dough layer will be layered atop our brownie base later on—a deliciously decadent surprise waiting to happen!
Step 7: Layering Your Heavenly Creation
Now comes perhaps one of my favorite parts—the assembly! Preheat your oven to 350°F (175°C) if you haven’t already; trust me when I say there’s nothing quite like anticipating those warm brownies baking away as aromas fill your home! Grab an 8×8 inch baking pan and line it with parchment paper for easy removal later on—this little trick is non-negotiable if you want clean-cut gems once they’re baked and cooled.
Begin by pouring half of your luscious brownie batter into the prepared pan, spreading it evenly across the bottom with a spatula or spoon. This base layer forms a rich foundation upon which we’ll build our masterpiece. Next, take spoonfuls of that delectable edible cookie dough we lovingly crafted earlier and dollop it strategically over the brownie base—you want some gaps between each scoop because we’ll cover it entirely with more brownie batter soon enough! Gently press down on each dollop just enough so they stick without losing their delightful height.
Once you’ve created this tantalizing layer cake effect with equal parts brownie goodness and cookie indulgence, pour over the remaining brownie batter like a velvety blanket enveloping everything underneath—don’t worry if some cookie dough peeks through; that’s what makes these gems special! Use a spatula to smooth out any rough edges or peaks so they bake uniformly—after all, even brownies deserve their moment in the spotlight!
Step 8: Baking Your Perfect Double-Chocolate Holiday Cookie Dough Brownie Gems
Now for the moment we’ve all been waiting for—slide that masterpiece into your preheated oven and let magic happen! Bake for approximately 25-30 minutes, but keep an eye on them towards the end because oven temperatures can vary dramatically; nobody wants burnt edges or undercooked centers ruining this gorgeous dessert! A toothpick inserted into the center should come out with only moist crumbs attached—not wet batter—that’s how you’ll know they’re done.
As they bake away blissfully inside your oven, take note of how incredible your kitchen smells right now—it’s intoxicating! Once they’re done baking (cue happy dance!), allow them to cool in their pan for at least 10-15 minutes before attempting removal—the cooling process allows everything to settle just right so you don’t have crumbly chaos when cutting them later on.
After they’ve cooled slightly but before they’re completely set (waiting is hard—I know!), lift them out by holding onto those parchment paper edges. Place them on a wire rack to cool completely before cutting into squares or gems. This chilling period enhances flavors while allowing those rich chocolatey layers time to meld beautifully together—a patience test worth every moment!
Final Touches: The Grand Reveal
Step 9: Cutting Into Your Sweet Masterpiece
Once cooled completely (it’ll feel like forever!), it’s time for perhaps my absolute favorite part—the grand reveal as you cut into these dreamy Double-Chocolate Holiday Cookie Dough Brownie Gems! Using a sharp knife gives cleaner cuts; wipe down between slices for neat edges that showcase those stunning layers—you want each bite perfect!
As you slice through these beauties—the lusciousness from both layers reveals itself—and let me tell you: there’s no greater joy than witnessing those contrasting textures come together harmoniously on each plate! Serve them warm or chilled (they shine either way) alongside a scoop of dairy-free vanilla ice cream—or simply enjoy them straight up as nature intended!
I promise you—the joy these desserts bring isn’t merely about taste; it’s about sharing warmth with loved ones during special moments throughout life’s journey together. These gems encapsulate love infused within every bite—a true celebration worthy enough for any holiday feast or cozy gathering at home.
So gather around friends and family alike because once they take their first bite? Well…you may find yourself surrounded by smiles brighter than any holiday lights could illuminate! Enjoy every crumb—you’ve earned it!
Storage and Enjoyment Tips for Your Double-Chocolate Holiday Cookie Dough Brownie Gems
Now that you’ve crafted these irresistible Double-Chocolate Holiday Cookie Dough Brownie Gems, it’s time to bask in the glory of your creation! The aroma wafting through your kitchen is just a hint of the chocolaty bliss that awaits. I can already imagine you sharing these delights with friends or savoring them during a cozy evening at home. But what happens when you have some leftovers (if that’s even possible)? Don’t fret; I’ve got you covered with some essential storage tips to keep your gems as delicious as the moment they came out of the oven.
Storing Leftover Double-Chocolate Holiday Cookie Dough Brownie Gems
To keep your Double-Chocolate Holiday Cookie Dough Brownie Gems at their peak flavor and texture, store them in an airtight container—this is absolutely paramount for preserving their moistness. If you can find one with a silicone seal, that’s even better; it truly locks in the freshness! Keeping them at room temperature will allow them to retain that gooey texture, and they’ll stay delightful for about 3 to 5 days. For those who want to maintain every crumb of fudgy goodness, I often suggest placing a slice of bread in the container alongside your brownies; this little trick helps absorb excess moisture without sacrificing that rich taste. Trust me, these gems only get more flavorful over time! When you’re ready to indulge again, simply reheat them in the microwave for about 10-15 seconds—this little burst of warmth creates a heavenly experience reminiscent of fresh-baked bliss.
Freezing Components for Later
If you find yourself with more cookie dough than you can handle—or if you want to prepare ahead for a special occasion—freezing is an amazing option! To freeze your Double-Chocolate Holiday Cookie Dough Brownie Gems properly, just cut them into squares and arrange them on a baking sheet lined with parchment paper. Flash freeze them for about an hour until they’re solid, then transfer the squares into a freezer-safe bag or container. They’ll keep beautifully frozen for up to three months! When cravings strike, simply remove as many as you desire—there’s no need to thaw first—and pop them directly into the oven or microwave. This convenience allows you to enjoy homemade decadence anytime without the fuss of making everything from scratch again. Honestly, who wouldn’t love having these sweet treats on hand for those surprise visits from friends or spontaneous late-night snacks?
Dessert
Double-Chocolate Holiday Cookie Dough Brownie Gems
Indulge in the delightful experience of baking with our Double-Chocolate Holiday Cookie Dough Brownie Gems. These scrumptious treats combine a rich, fudgy brownie base with a creamy, edible cookie dough layer on top, creating a decadent dessert that’s perfect for any occasion. Each bite offers a mouthwatering blend of chocolatey goodness and chewy cookie dough, making them an instant favorite for family gatherings or cozy nights in. Easy to make and impossible to resist, these gems will surely become a cherished addition to your holiday baking repertoire.
- Prep Time: 20 minutes
- Cook Time: 30 minutes
- Total Time: 50 minutes
- Yield: Approximately 16 servings 1x
- Category: Dessert
- Method: Baking
- Cuisine: American
Ingredients
- 1 cup unsalted butter (melted and softened)
- 1 cup granulated sugar
- ¾ cup brown sugar
- 2 large eggs
- 1 teaspoon vanilla extract
- 1 cup cocoa powder
- 1 cup all-purpose flour (heat-treated)
- ½ teaspoon salt
- ½ teaspoon baking powder
- 2 tablespoons milk
Instructions
- Preheat your oven to 350°F (175°C). Grease and line an 8×8 inch baking pan with parchment paper.
- In a mixing bowl, combine melted butter and granulated sugar until smooth. Add eggs one at a time, mixing well after each addition. Stir in vanilla extract.
- Sift together cocoa powder, flour, salt, and baking powder before gently folding into the wet ingredients until just combined.
- In another bowl, beat softened butter and brown sugar until fluffy. Mix in milk and remaining vanilla extract before folding in heat-treated flour.
- Pour half of the brownie batter into the prepared pan. Add dollops of cookie dough on top, followed by the rest of the brownie batter.
- Bake for 25–30 minutes or until a toothpick comes out with moist crumbs attached.
- Let cool before cutting into squares.
Nutrition
- Serving Size: 1 square (70g)
- Calories: 290
- Sugar: 24g
- Sodium: 120mg
- Fat: 14g
- Saturated Fat: 8g
- Unsaturated Fat: 6g
- Trans Fat: 0g
- Carbohydrates: 38g
- Fiber: 2g
- Protein: 3g
- Cholesterol: 50mg
Leave a Comment