

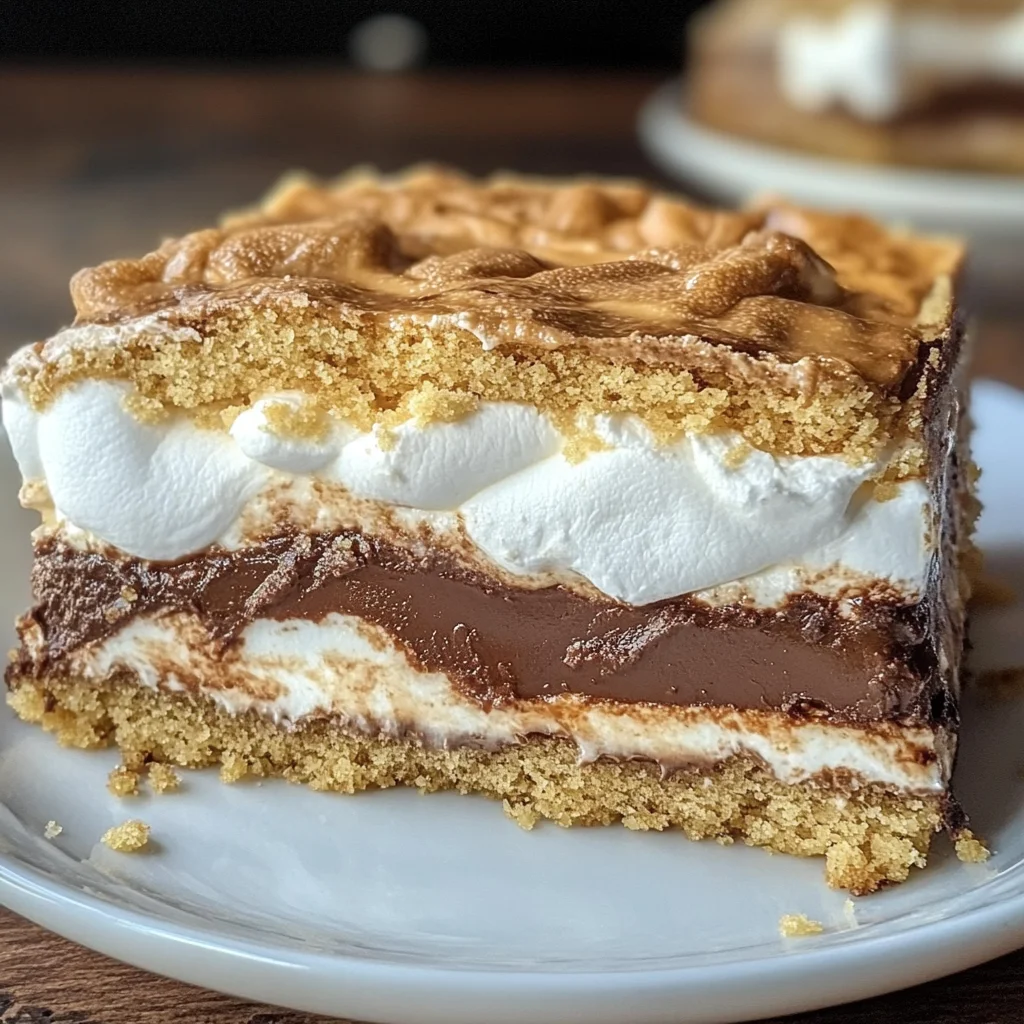
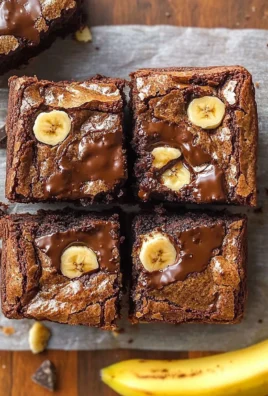
There’s something utterly magical about the experience of baking—a sort of alchemy that transforms humble ingredients into a symphony of flavors. When I think about making this Smores Cake, I can’t help but feel a wave of nostalgia wash over me, transporting me back to warm summer nights spent around a crackling campfire. The laughter, the warmth, and the sweet aroma of melting marshmallows and chocolate wafting through the air create memories that linger long after the last bite. This recipe is more than just dessert; it’s an invitation to bring that cozy campfire magic indoors, allowing you to share those delicious moments with friends and family any time of year. As you take that first bite, you’ll experience the delightful crunch of graham cracker crust mingling with gooey marshmallow fluff and rich chocolate—a truly extraordinary combination that will make your heart sing.
Now, I promise you that this Smores Cake is not just for special occasions; it’s perfect for any day when you want to indulge in something sweet and comforting. It carries with it a sense of joy that is simply infectious. Whether you’re celebrating a birthday, hosting a casual get-together, or just craving something decadent after dinner, this cake fits the bill beautifully. Each layer tells a story—starting from that graham cracker base to the gooey marshmallow topping—as if it’s whispering sweet secrets of summer nights into your soul. And trust me on this: once you’ve tasted this cake, you’ll understand why it holds such a cherished place in my heart.
Smores Cake: A Cozy Indoor Delight
Now let’s dive into making this delightful Smores Cake together! As we embark on this culinary journey, get ready for some fun and deliciousness. The process is straightforward yet incredibly rewarding. With every step, you’ll feel your excitement building as the kitchen fills with the mouthwatering scent of chocolate and marshmallows. So grab your apron; let’s create something unforgettable!

Perfect Results, Every Single Time! 🌡️
Never serve dry or undercooked food again. The Chef-X Digital Probe gives you an accurate temperature reading in under 3 seconds. It's the secret tool I use for perfect steaks, juicy chicken, and safe milk temperatures.
Ingredients:
As we gather our ingredients for this Smores Cake, imagine how each one plays an essential role in creating that perfect balance of flavor and texture. Every scoop, pour, and sprinkle contributes to what will ultimately become a slice of heaven on your plate.
- 1 cup (2 sticks or 226g) unsalted butter, softened to room temperature. This ingredient is crucial for achieving that light and fluffy texture we’re aiming for in our Smores Cake. Softened butter creams beautifully with sugar to create an airy structure in baked goods; if it’s too cold or melted, you might end up with a dense cake or spreading mess instead! Look for high-quality butter—European-style varieties have higher fat content which adds richness and depth to your cake.
- 1/2 cup (100g) brown sugar. The molasses present in brown sugar not only lends moisture but also imparts a subtle caramel flavor that enhances the overall taste profile of our cake. Don’t rush to swap it out; its unique richness is non-negotiable here! Choose light brown sugar for a milder flavor or dark brown sugar if you want to amp up those caramel notes even further.
- 1 cup (200g) granulated sugar. This common pantry staple is vital for sweetness and helps achieve that lovely golden crust when baked. Its fine texture dissolves easily during creaming with butter, ensuring even distribution throughout the batter. If you’re looking for alternatives due to dietary preferences or restrictions, coconut sugar can be used but may slightly alter both flavor and color.
- 2 large eggs. Eggs play multiple roles—they add moisture while also providing structure due to their proteins which help bind everything together seamlessly! Always use room-temperature eggs when baking; they blend more smoothly into your batter and help achieve an emulsion that’s stable and fluffy.
- 2 teaspoons pure vanilla extract. Ahh, vanilla—the secret weapon in almost every dessert! This aromatic extract elevates flavors like nothing else can; it rounds out sweetness beautifully while adding complexity in ways we often take for granted. Opt for pure vanilla rather than imitation for superior flavor—trust me on this one!
- 2 2/3 cups (335g) all-purpose flour. Flour serves as the backbone of our cake’s structure while providing stability during baking. But not all flours are created equal! For best results here, stick with all-purpose flour because its protein content strikes a perfect balance between tenderness and chewiness—both essential qualities in achieving that delightful cake crumb.
- 3/4 teaspoon kosher salt. You might wonder why salt makes an appearance in our dessert recipe—it’s absolutely paramount! Salt enhances sweetness by balancing flavors—it brings everything into harmony while highlighting those rich chocolatey notes we’ll be adding later.
- 1 1/2 cups (150g) graham cracker crumbs. These little nuggets add texture reminiscent of traditional s’mores while forming the foundation layer for our cake! You can buy them pre-packaged or crush up whole graham crackers yourself—just be sure they’re finely ground so they integrate well into your batter without clumping.
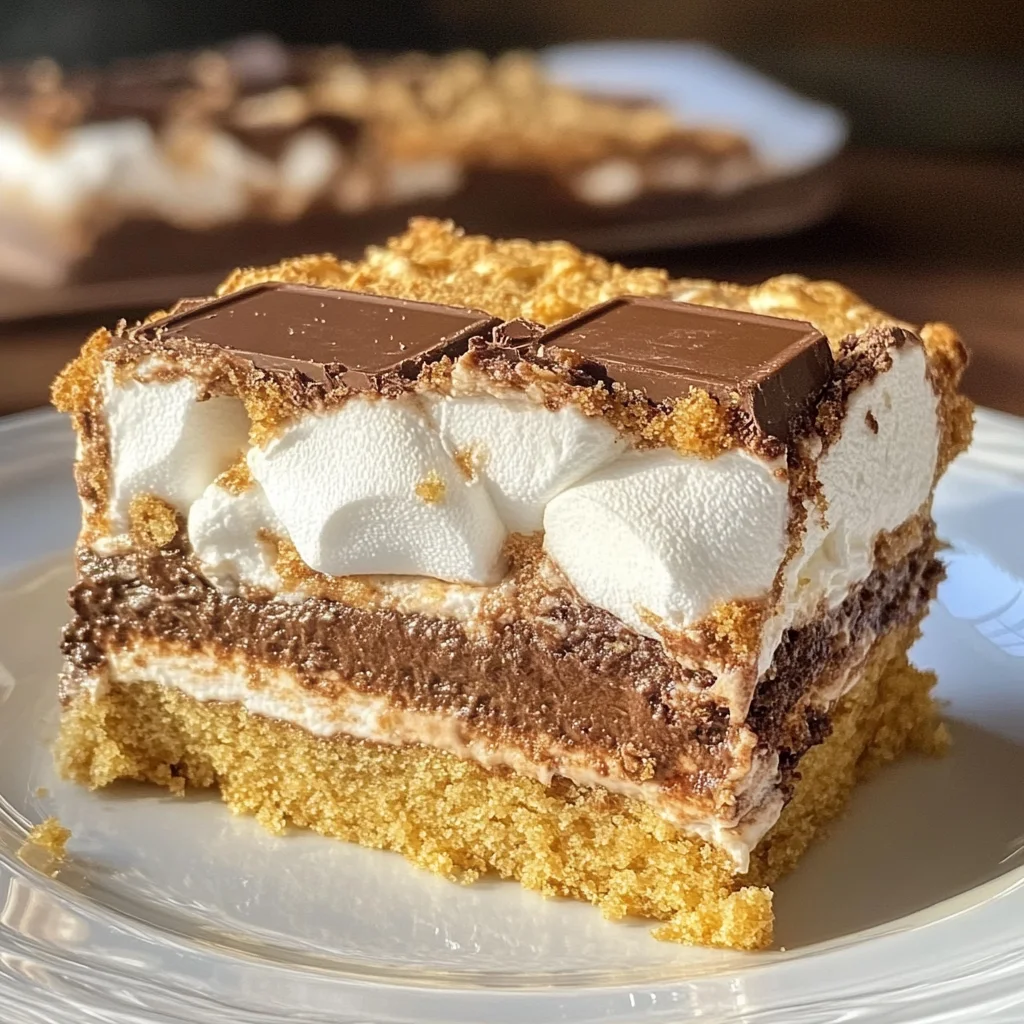
- 4 XL Hershey bars (4.4 ounces each). This beloved classic will melt beautifully within our layers, creating pockets of irresistible chocolate goodness throughout the cake! You could swap it out with another brand if desired but keep in mind: Hershey’s has that nostalgic flavor many associate with s’mores.
- 16 ounces vegan marshmallow fluff. A delightful alternative to traditional marshmallows offering gooeyness without animal-derived ingredients—this fluff is what really brings our s’mores experience home! Make sure it’s well-blended before spreading over your cake layers so every bite captures its lusciousness perfectly.
Equipment You’ll Need:
Before we jump into action mixing all these wonderful ingredients together, let’s talk about having the right tools at hand—it truly makes all the difference! Think of these pieces as essential partners on this adventure—they’ll help ensure our Smores Cake turns out perfectly every single time.
- Large mixing bowl – A sturdy bowl is essential here since we’ll be doing some serious mixing! Look for one made from glass or stainless steel—it provides excellent durability while allowing easy monitoring as you mix ingredients together until fully combined
- Electric mixer (or whisk) – To achieve that fluffy texture when creaming butter and sugars together effortlessly! An electric mixer speeds things up significantly compared to whisking by hand but don’t hesitate if you prefer getting some arm workout time in instead!
- Measuring cups & spoons – Accurate measurements are critical when baking—too much flour or too little sugar can throw everything off balance! Investing in good-quality measuring tools will pay off handsomely down the line
- Rubber spatula – Perfectly designed for scraping down sides of bowls while incorporating dry ingredients evenly into wet mixtures without leaving behind any precious batter
- 9×13-inch baking dish – This size allows plenty of room for rising during baking while ensuring even heat distribution across all corners—don’t skimp here; opt for non-stick options if possible
Preparing the Smores Cake
Step 1: Creaming Together Butter & Sugars
Let’s start by preheating our oven to 350°F (175°C)—the anticipation builds as I can already smell those sweet aromas wafting through my kitchen! In a large mixing bowl, combine your softened unsalted butter along with both sugars—the granulated sugar contributing sweetness while brown sugar enhances depth through its caramel notes. Now here’s where magic happens: using either an electric mixer or whisking vigorously by hand (which works up quite an arm workout!), blend these three components until they become light and fluffy—this process known as creaming creates tiny air bubbles necessary for leavening later on during baking! You’re looking for pale yellow color changes along with noticeable volume increase; don’t rush this step as proper aeration leads directly towards achieving that perfect rise!
Step 2: Add Eggs & Vanilla Extract
Next up are our eggs—crack them gently into your mixture one at a time followed by pouring in pure vanilla extract—the fragrant essence swirling through air adds dimension beyond mere sweetness alone! Continue beating until fully incorporated—you should see smooth consistency appear throughout without specks remaining from egg whites or yolks left behind which indicate under-mixing occurred earlier on… Trust me when I say skipping thorough blending now could lead down disastrous paths later!
Step 3: Whisk Dry Ingredients Together
In another separate bowl—we’re going back-to-back here—ahead lies dry ingredients waiting patiently: flour mixed alongside kosher salt blended thoroughly first before introducing graham cracker crumbs next into their midst—a harmonious trio working closely together ensuring balanced textures exist within final result later down road ahead… Take care folding everything gently using spatula ensuring no lumps remain hidden away waiting surprise attacks during bake time itself!
Step 4: Combine Mixtures Carefully
With dry mixes now united harmoniously—it’s showtime combining both wet/dry mixtures carefully under low speed initially then gradually ramping up until everything becomes fully integrated into cohesive doughy mass looking forward seeing golden goodness emerge from oven soon enough… Remember though: overmixing could lead tough results so keep watchful eyes peeled avoiding unnecessary stretching effects occurring amongst gluten strands developing unexpectedly leading disappointment thereafter… Patience pays off big dividends here!
As we continue crafting this delicious dessert masterpiece together—you’ll notice how my heart sings at every step taken towards completing each stage beautifully laid before us… So grab those trusty tools again because we’re close now—I can’t wait to share more secrets as we assemble everything next round like true culinary artists united through love food brings us all!
Stay tuned dear friend…
Step 5: Spreading the Fluff of Magic
Now, we arrive at one of the most delightful parts of our Smores Cake journey—spreading that luscious vegan marshmallow fluff over the chocolatey layer. This step is where the magic truly begins to unfold! Using a spatula or even a sturdy spoon, gently dollop the marshmallow fluff across the top of your chocolate-laden crust. The fluff is soft and airy, like clouds just waiting for you to nestle them into place. As you spread it evenly over the surface, be sure to reach all edges and corners; every inch deserves that heavenly sweetness. I find that using gentle pressure helps to avoid tearing into the underlying layers, so take your time here.
Why is this step so crucial? The marshmallow fluff not only adds an utterly intoxicating sweetness but also serves as a barrier between the bottom chocolate layer and the crumbly top. This creates a beautifully layered effect that mimics the iconic flavor profile of traditional s’mores, with each bite delivering a sweet, gooey surprise. You want to ensure that it’s spread smoothly and evenly because any gaps could lead to uneven baking—a slight imbalance can change the texture and mouthfeel in an unexpected way. Trust me on this—the more care you give to this step, the more rewarding your final outcome will be!
Step 6: Crumbling with Love
Once you’ve successfully spread that dreamy layer of marshmallow fluff, it’s time for what I call “crumbly love.” With your remaining dough, crumble it into small pieces over the entire surface of the marshmallow fluff. This isn’t just any crumbling; think about creating tiny nuggets that will bake into golden bubbles of flavor reminiscent of graham crackers by a campfire. To do this, take small pinches of dough and let them fall gently from your fingers. Aim for irregular shapes and sizes—this is what gives character to your Smores Cake!
This step enhances not only aesthetics but also offers texture contrast once baked. These crumbles will become crisp on the outside while leaving a soft center that harmonizes beautifully with both the gooey marshmallows below and the rich chocolate above. After you’ve sprinkled all of your dough over, resist the temptation to press down too hard; a gentle pat is all that’s needed to help everything adhere without squeezing out all those lovely air pockets you’ve created in your dough. Remember, patience is key here—allowing those little pieces room to breathe during baking ensures they turn into delightful bites rather than flatness.
Step 7: Baking Into Bliss
Now comes perhaps the most thrilling moment—the transition from raw batter into baked bliss! Carefully place your masterpiece in a preheated oven set at 350°F (175°C). This temperature is absolutely paramount for achieving that perfect balance between a golden-brown crust and gooey interior—a feat perfected through both science and art in baking! Set your timer for 30-35 minutes, but keep an eye on it as well; ovens can be tricky little beasts sometimes. You’ll want to look for a beautifully puffed appearance with edges turning golden brown—this visual cue signals that everything is coming together wonderfully.
As it bakes, you’ll be enveloped in an aroma so enticing it might just transport you back to childhood camping trips filled with laughter and warm s’mores by flickering firelight. It’s essential not to rush this step; allowing enough time ensures proper caramelization of sugars which contributes profoundly to flavor development—think deep notes of buttery goodness melded with sweet nostalgia. When checking for doneness, gently press down in the middle; it should feel set yet slightly springy rather than jiggly or overly firm. Once done, pull it out carefully (remember—hot surfaces are no friends!), letting it cool in its pan for about 10-15 minutes before slicing.
Step 8: Cooling Down – The Anticipation Builds
After that exhilarating bake-time adventure, it’s time for a brief cooldown period—a crucial phase that’s as much about anticipation as it is about technique! Allowing your Smores Cake to rest in its pan not only helps stabilize those fabulous layers but also enhances flavors as they meld together beautifully during this time. I recommend letting it sit at room temperature for at least 20 minutes before attempting to cut into it; this patience will reward you tenfold when serving!
While you wait, take a moment to admire your creation—the golden crumbles atop contrasting with soft marshmallow fluff peeking through creates an enticing visual spectacle that’s simply irresistible! If you’re feeling adventurous—or if you have little ones helping out—this would be an excellent moment for some playful decorations! Think about drizzling melted vegan chocolate or sprinkles atop once cooled if you’re looking for some extra flair. But trust me on this: even plain, each slice will be utterly extraordinary.
Final Touches – Serving Up Smore Happiness!
Now we’re reaching the finish line—and oh how sweet it is! Once sufficiently cooled (and if you can manage it without devouring half), grab a sharp knife and gently cut into squares—you’ll want to see those layers revealing themselves like gifts unwrapped at a birthday party! Each piece should hold its shape nicely yet retain that signature softness from our fluffy friend below.
When serving up slices of this Smores Cake magic, consider pairing them with fresh fruit like strawberries or raspberries; their tartness complements the sweetness beautifully while bringing freshness alongside rich flavors—a truly symphonic experience! And if you’re feeling indulgent (and who wouldn’t?), why not serve alongside some coconut whipped cream? The lightness will elevate each decadent bite even higher.
I promise you—each bite will transport you straight back to campfire evenings filled with laughter and joy shared among friends and family. Your guests will be raving about this dessert long after they leave your table! So gather around with loved ones because nothing says happiness quite like sharing slices of homemade Smores Cake together—it’s comfort food at its finest! Enjoy every moment—and remember: life’s too short not to indulge in delightful desserts made with love!
Storage and Enjoyment Tips for Your Smores Cake
Now that you’ve created this heavenly Smores Cake, it’s time to bask in the joy of sharing it with friends and family—or perhaps just indulging all by yourself! Trust me when I say that the aroma wafting from your kitchen is just a taste of what’s to come. The beauty of this cake is not only in its decadent layers but also in its ability to bring everyone together around a sweet treat reminiscent of campfire bliss. But before we dive into the delightful experience of enjoying it, let’s talk about how to properly store any leftovers, though I have a feeling they might not last long!
Storing Leftover Smores Cake
To keep your Smores Cake as fresh and delightful as when it first came out of the oven, store it in an airtight container at room temperature. This is crucial because you want to maintain that perfect balance of softness and flavor. If you’re concerned about it getting too dry, try placing a slice of bread in the container with the cake—this little trick helps keep moisture locked in! Properly stored, your cake can last up to four days without losing its charm, although I doubt it will stick around that long. When you take a bite after a day or two, the flavors meld beautifully, creating an even more profound satisfaction as the ingredients harmonize over time. If you’re thinking about reheating it, pop individual pieces in the microwave for just a few seconds—this will revive the gooey marshmallow fluff and melt those chocolatey layers, making each bite utterly intoxicating once more.
Freezing Smores Cake for Later
If you find yourself with extra slices or want to prepare ahead for a gathering, freezing your Smores Cake is an excellent option! To do this properly, slice the cake into individual portions and wrap each piece tightly in plastic wrap before placing them in an airtight freezer bag. This method ensures they stay fresh and prevents freezer burn from stealing away their deliciousness. When frozen correctly, your cake can last for up to three months without losing its delectable quality. When you’re ready to enjoy those frozen delights again, simply thaw them overnight in the refrigerator or let them sit at room temperature for about an hour before indulging. The convenience factor here is absolutely paramount; imagine having a slice of homemade goodness ready whenever that sweet craving hits!
With these tips on storage and freezing, you’re all set to enjoy this extraordinary dessert at your leisure!
Smores Cake
Indulge in our delightful Smores Cake—a heavenly blend of flavors that transports you back to cozy campfire nights. Try it today!
- Prep Time: 20 minutes
- Cook Time: 35 minutes
- Total Time: 55 minutes
- Yield: Approximately 12 servings 1x
- Category: Dessert
- Method: Baking
- Cuisine: American
Ingredients
- 1 cup unsalted butter, softened
- 1/2 cup brown sugar
- 1 cup granulated sugar
- 2 large eggs
- 2 teaspoons pure vanilla extract
- 2 2/3 cups all-purpose flour
- 3/4 teaspoon kosher salt
- 1 1/2 cups graham cracker crumbs
- 4 XL chocolate bars (Hershey's or equivalent)
- 16 ounces vegan marshmallow fluff
Instructions
- Preheat your oven to 350°F (175°C).
- In a large mixing bowl, cream together softened butter, brown sugar, and granulated sugar until light and fluffy.
- Add eggs one at a time and mix in vanilla extract until well combined.
- In another bowl, whisk together flour, salt, and graham cracker crumbs.
- Gradually combine dry ingredients with wet ingredients until fully integrated.
- Spread half the batter in a greased 9×13-inch baking dish. Layer with chocolate bars and spread vegan marshmallow fluff evenly on top.
- Crumble the remaining batter over the fluff layer.
- Bake for 30-35 minutes or until golden brown and set in the center.
- Allow cooling before slicing into squares.
Nutrition
- Serving Size: 1 slice (100g)
- Calories: 387
- Sugar: 34g
- Sodium: 210mg
- Fat: 20g
- Saturated Fat: 10g
- Unsaturated Fat: 10g
- Trans Fat: 0g
- Carbohydrates: 47g
- Fiber: 1g
- Protein: 4g
- Cholesterol: 50mg
Leave a Comment