

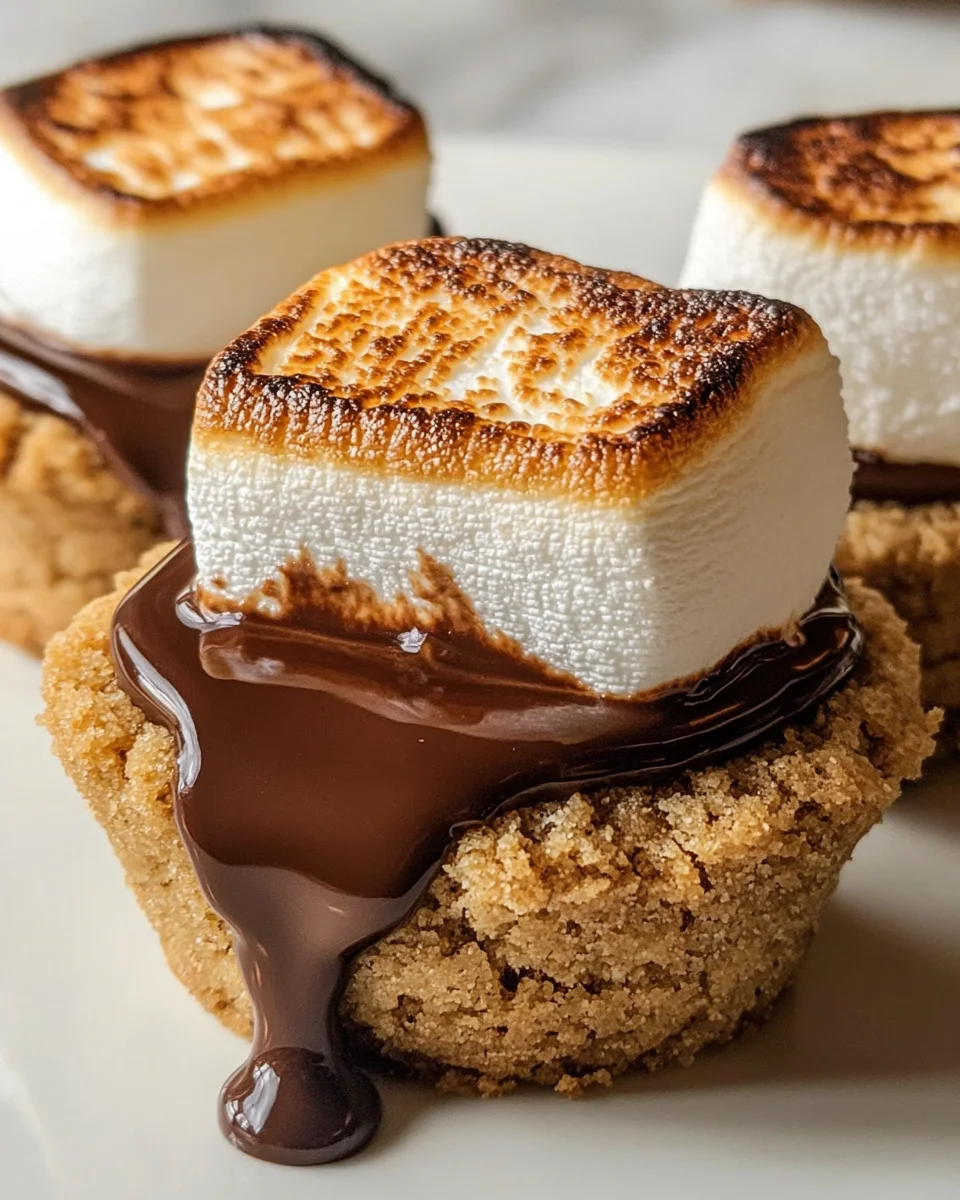
S’mores Cookie Cups are a delightful twist on the classic campfire treat, combining the flavors of graham crackers, chocolate, and gooey marshmallows into a fun and easy-to-eat cookie cup. Perfect for parties, family gatherings, or simply as an indulgent dessert at home, these cookie cups offer a warm, comforting experience that everyone will love. The unique presentation makes them a standout choice for any occasion.
Why You’ll Love This Recipe
- Easy to Make: With simple ingredients and straightforward steps, these cookie cups come together quickly.
- Crowd-Pleaser: They are perfect for parties and gatherings, ensuring no one leaves without a smile.
- Versatile: Customize with different types of chocolate or add nuts for a fun twist.
- Kid-Friendly: Children will love both making and eating these delicious treats.
- Warm and Gooey: Enjoy them fresh from the oven for a melt-in-your-mouth experience.
Tools and Preparation
Before starting your S’mores Cookie Cups, gather your tools to ensure a smooth baking process.
Essential Tools and Equipment
- Mini muffin pan
- Nonstick cooking spray
- Mixing bowls
- Electric hand mixer (or stand mixer)
- Measuring cups and spoons
- Whisk
Importance of Each Tool
- Mini muffin pan: Essential for creating perfectly shaped cookie cups that hold all the delicious fillings.
- Electric hand mixer: Makes mixing butter and sugars easy, achieving that desired fluffy texture in no time.
Ingredients
For the Cookie Base
- 1¼ cup all-purpose flour
- 1 cup graham cracker crumbs
- ½ teaspoon baking soda
- ¼ teaspoon salt
- 1/2 cup (1 stick) butter (softened)
- 1/2 cup light brown sugar (packed)
- 1/3 cup granulated sugar
For the Filling
- 1 large egg
- 1 teaspoon vanilla extract
- 12 large marshmallows (cut in half)
- 2 bars (1.55 oz each) Hershey’s milk chocolate
How to Make S’mores Cookie Cups
Step 1: Preheat the Oven
Preheat your oven to 350℉. Spray a mini muffin pan with nonstick cooking spray to prevent sticking. Set aside.
Step 2: Prepare Dry Ingredients
In a small mixing bowl, whisk together the all-purpose flour, graham cracker crumbs, baking soda, and salt. Set this mixture aside for later use.
Step 3: Cream Butter and Sugars
In a separate larger bowl, use an electric hand mixer or stand mixer with a paddle attachment to beat the softened butter, brown sugar, and granulated sugar until well combined and fluffy—about 1 to 2 minutes.
Step 4: Add Egg and Vanilla
Add in the large egg and vanilla extract to the butter mixture. Continue beating until everything is thoroughly combined.
Step 5: Combine Wet and Dry Ingredients
Dump the dry ingredient mixture into the bowl of wet ingredients. Mix on low speed just until combined; avoid overmixing. The dough should be somewhat crumbly but will hold together when pressed.
Step 6: Fill Muffin Tins
Scoop the dough into each mini muffin tin cup. Fill them generously and press down on the dough to even out the tops.
Step 7: Bake Dough
Place the muffin pan in your preheated oven and bake for about 8 minutes. The cookie cups will look slightly underdone—this is exactly what you want!
Step 8: Create Indents for Marshmallows
Immediately after removing from the oven, take a teaspoon measuring spoon and gently press it into the center of each mini muffin cup to create an indent for marshmallows.
Step 9: Add Marshmallows
Place half of a marshmallow into each indent with the sticky side facing down. Press lightly so they adhere well.
Step 10: Cool Slightly
Allow your S’mores Cookie Cups to cool at room temperature for about 15 minutes.
Step 11: Add Chocolate
Top each marshmallow with one square of Hershey’s milk chocolate.
Step 12: Broil Carefully
Turn your broiler to high heat. Place the mini muffin pan back in the oven for about 1 to 2 minutes—watch them closely as they can toast or burn very quickly!
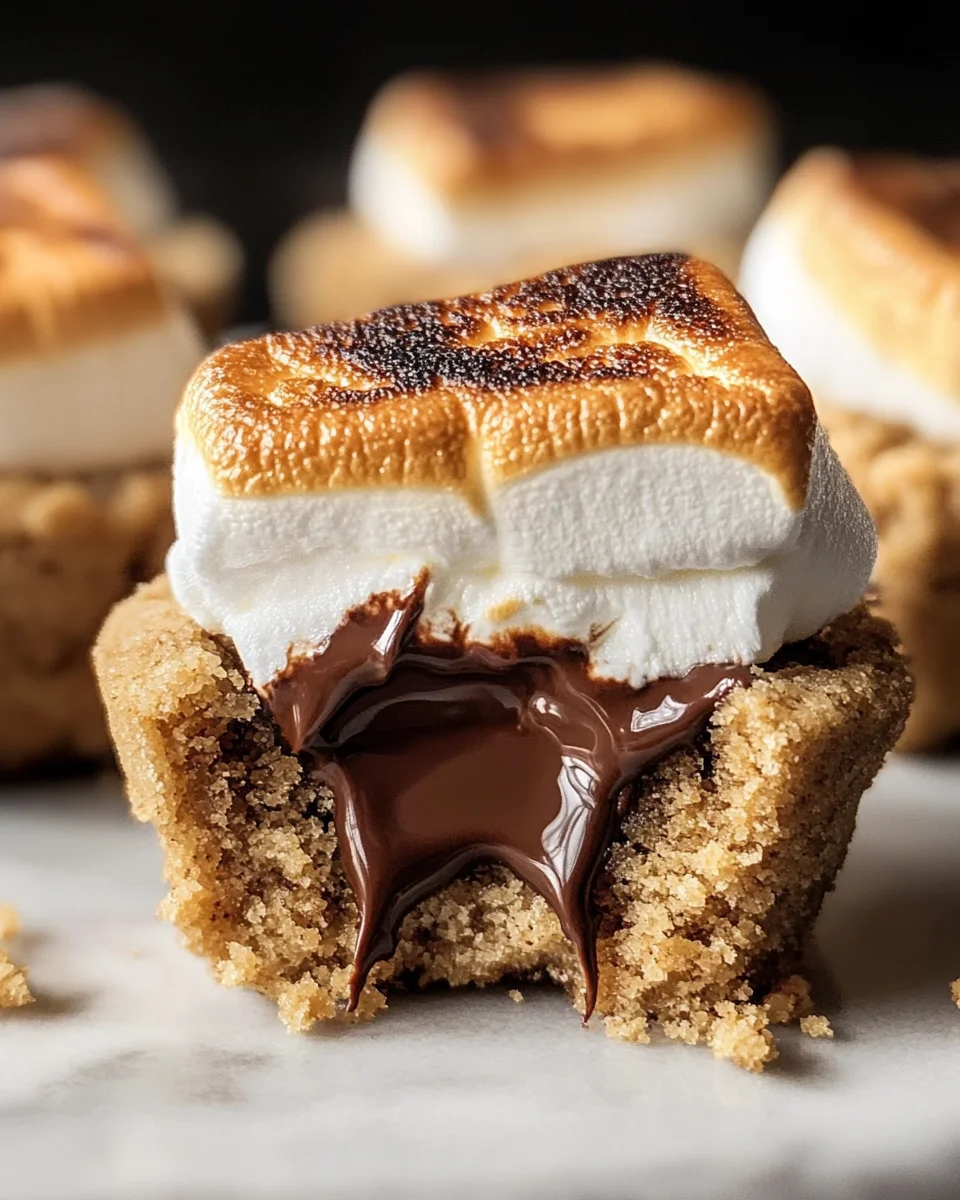
Step 13: Final Cooling
Let cool for about 5–10 minutes before enjoying. You can eat them warm for that gooey goodness or let them cool completely at room temperature if you prefer.
These S’mores Cookie Cups are sure to become a favorite in your dessert rotation!
How to Serve S’mores Cookie Cups
S’mores Cookie Cups are a delightful treat that can be enjoyed in various ways. Whether you want to impress guests or have a cozy family night, these cookie cups can fit any occasion.
With Ice Cream
- Vanilla Ice Cream: A classic pairing that adds creaminess and balances the sweetness.
- Chocolate Ice Cream: Enhance the chocolate flavor with rich chocolate ice cream.
- Marshmallow Swirl Ice Cream: For a fun twist, try this flavor to complement the s’mores theme.
As a Party Treat
- Dessert Platter: Arrange S’mores Cookie Cups on a beautiful platter alongside other desserts for a stunning display.
- Gift Boxes: Package them in decorative boxes as sweet gifts for friends or family.
With Beverages
- Hot Chocolate: Serve them alongside a warm cup of hot chocolate for a comforting experience.
- Coffee: Pairing with coffee adds a nice contrast and enhances the flavors of the cookie cups.
On Their Own
- Freshly Baked: Enjoy them warm right out of the oven for a gooey treat.
- At Room Temperature: These cookie cups taste just as good once cooled, making them perfect for make-ahead treats.

Perfect Results, Every Single Time! 🌡️
Never serve dry or undercooked food again. The Chef-X Digital Probe gives you an accurate temperature reading in under 3 seconds. It's the secret tool I use for perfect steaks, juicy chicken, and safe milk temperatures.
How to Perfect S’mores Cookie Cups
Perfecting your S’mores Cookie Cups ensures they turn out delicious every time. Here are some helpful tips:
- Use Fresh Ingredients: Always use fresh eggs and high-quality chocolate for the best flavor.
- Don’t Overmix the Dough: Mix just until combined to keep the cookie cups tender and chewy.
- Adjust Baking Time: Every oven is different; keep an eye on them during baking to avoid overcooking.
- Broil Carefully: When broiling the marshmallows, watch closely to prevent burning; they can toast quickly!
Best Side Dishes for S’mores Cookie Cups
While S’mores Cookie Cups are delightful on their own, certain side dishes can enhance your dessert experience. Consider these tasty pairings:
- Fruit Salad: A light and refreshing contrast that balances the sweetness of the cookie cups.
- Cheese Platter: Offer a variety of cheeses to create an interesting flavor combination with sweet and savory notes.
- Chocolate Fondue: Provide extra dipping options with melted chocolate; fruit or pretzels can add variety here.
- Popcorn Bar: Offer flavored popcorns like caramel or chocolate for an entertaining snack alongside dessert.
- Mini Cupcakes: These bite-sized treats can complement S’mores Cookie Cups and offer variety in flavors.
- Milkshake Station: Create fun milkshake flavors that guests can customize, pairing perfectly with your dessert!
Common Mistakes to Avoid
Making S’mores Cookie Cups can be a delightful experience, but avoiding common mistakes will ensure they turn out perfectly.
- Using cold butter: Cold butter can lead to dense cookie cups. Always use softened butter for a light and fluffy texture.
- Skipping the cooling time: Letting them cool is essential. If you skip this step, the chocolate may melt too much, making it messy to eat.
- Overbaking: These cookie cups should look slightly underdone when you take them out of the oven. Overbaking can make them dry instead of chewy.
- Not measuring ingredients accurately: Accurate measurements are key. Use proper measuring cups and spoons for best results.
- Ignoring the broiling step: Broiling gives that perfect toasted marshmallow flavor. Don’t skip this step, but keep a close eye to prevent burning.
Storage & Reheating Instructions
Refrigerator Storage
- Store S’mores Cookie Cups in an airtight container.
- They can last up to 5 days in the fridge.
Freezing S’mores Cookie Cups
- Freeze them in a single layer on a baking sheet before transferring to an airtight freezer bag.
- They will stay good for up to 3 months in the freezer.
Reheating S’mores Cookie Cups
- Oven: Preheat your oven to 350°F and warm for about 5-7 minutes for best results.
- Microwave: Heat each cup for about 10-15 seconds until warm; be careful not to overheat.
- Stovetop: Place in a covered skillet over low heat for a few minutes, watching closely.
Frequently Asked Questions
Here are some common questions people have about making S’mores Cookie Cups.
How do I make S’mores Cookie Cups gluten-free?
You can substitute regular flour with a gluten-free all-purpose blend. Ensure that your graham cracker crumbs are also gluten-free.
Can I use different types of chocolate?
Absolutely! Feel free to use dark chocolate or flavored chocolate bars for a twist on the classic S’mores taste.
How long do S’mores Cookie Cups last?
When stored properly, they will last up to 5 days in the refrigerator and up to 3 months in the freezer.
Can I customize toppings on my S’mores Cookie Cups?
Yes! You can add nuts, peanut butter chips, or even caramel for extra flavor. Get creative!
What can I serve with S’mores Cookie Cups?
These treats pair wonderfully with milk or a scoop of vanilla ice cream for an indulgent dessert experience.
Final Thoughts
S’mores Cookie Cups are not only easy to make but also incredibly versatile. You can customize them with different chocolates or toppings based on your preference. Try these delightful treats today and enjoy their warm, gooey goodness!
S’mores Cookie Cups
S’mores Cookie Cups are a delightful fusion of the classic campfire treat and an easy-to-eat dessert that everyone will adore. These mini cookie cups feature the warm, comforting flavors of graham crackers, rich chocolate, and gooey marshmallows, making them perfect for parties, family gatherings, or a cozy night at home. Their unique presentation is sure to impress guests and satisfy sweet cravings alike. Enjoy these treats warm from the oven for a melty experience or allow them to cool for an equally delightful bite. With just a few simple ingredients and steps, you can indulge in these irresistible S’mores Cookie Cups anytime.
- Prep Time: 20 minutes
- Cook Time: 10 minutes
- Total Time: 30 minutes
- Yield: Makes approximately 24 cookie cups 1x
- Category: Dessert
- Method: Baking
- Cuisine: American
Ingredients
- 1¼ cup all-purpose flour
- 1 cup graham cracker crumbs
- ½ teaspoon baking soda
- ¼ teaspoon salt
- ½ cup butter (softened)
- ½ cup light brown sugar (packed)
- ⅓ cup granulated sugar
- 1 large egg
- 1 teaspoon vanilla extract
- 12 large marshmallows (cut in half)
- 2 bars (1.55 oz each) Hershey's milk chocolate
Instructions
- Preheat your oven to 350°F and spray a mini muffin pan with nonstick cooking spray.
- In a bowl, whisk together flour, graham cracker crumbs, baking soda, and salt; set aside.
- In another bowl, beat butter with brown and granulated sugars until fluffy.
- Add egg and vanilla; mix until well combined.
- Gradually combine the dry ingredients with the wet mixture until just blended.
- Fill muffin cups with dough and press down gently; bake for about 8 minutes until slightly underdone.
- Create indents in each cup using a teaspoon and place half a marshmallow inside each indent.
- Top with chocolate squares and broil for 1-2 minutes until toasted.
- Let cool slightly before serving.
Nutrition
- Serving Size: 1 cookie cup (30g)
- Calories: 140
- Sugar: 10g
- Sodium: 80mg
- Fat: 7g
- Saturated Fat: 4g
- Unsaturated Fat: 2g
- Trans Fat: 0g
- Carbohydrates: 17g
- Fiber: <1g
- Protein: 1g
- Cholesterol: 15mg

Leave a Comment