

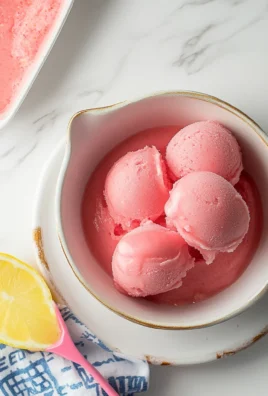
When I think of desserts that are as delightful as they are nostalgic, one creation comes to mind: the Hostess Snowball Cake. Imagine layers of moist chocolate cake slathered with marshmallow fluff and enrobed in a cloud of sweet, delicious coconut. Just reading about it makes you want to dive right in. Once you take a bite, the flavors of chocolate and coconut blend harmoniously, creating a luxurious treat perfect for any occasion.
Growing up, this cake was more than just a dessert; it was a celebration on birthdays, holidays, or just a regular Wednesday that needed a sprinkle of delight. Whether it was a surprise for a friend or an excuse to gather family around, the Hostess Snowball Cake always brought smiles to faces and warmth to hearts. Ideal for parties, potlucks, or a cozy night in, it promises an explosion of flavor that will make your taste buds dance.
Why You'll Love This Hostess Snowball Cake
- This incredible Hostess Snowball Cake transforms simple everyday ingredients into restaurant-quality flavors that will blow your mind completely.
- Foolproof recipe techniques guarantee perfect results every single time, making even novice cooks feel like professional chefs instantly.
- Stunning visual appeal with gorgeous colors and mouthwatering aromas creates the ultimate Instagram-worthy dish for any special occasion.
- Endlessly adaptable for different dietary needs while working beautifully for meal prep, date nights, or entertaining large groups effortlessly.
Ingredients for Hostess Snowball Cake
Here’s what you’ll need to make this delicious Hostess Snowball Cake:
1 ¾ cups all-purpose flour – All-purpose flour serves as the base for the cake, creating a perfectly fluffy texture.
¾ cup unsweetened cocoa powder – The cocoa powder infuses a deep chocolate flavor that balances the sweetness perfectly.
1 ½ tsp baking powder – Baking powder helps the cake rise, ensuring a light and airy consistency.
1 ½ cups granulated sugar – Sugar not only sweetens the cake but also helps it maintain moisture, allowing for a tender crumb.
3 large eggs – Eggs provide the structure as well as moisture, contributing to a rich flavor and texture.
½ cup unsalted butter – Make sure it’s softened for easier mixing, as the butter adds richness and flavor.
1 cup whole milk (or almond/oat milk) – Milk adds moisture and creaminess. You can substitute with your favorite plant-based alternative for a dairy-free option.
1 cup marshmallow fluff – This delightful treat will create the creamy filling and exterior of the cake, adding sweetness and texture.
2 cups sweetened shredded coconut – The shredded coconut is responsible for the snowy look and provides a unique chewiness.
How to Make Hostess Snowball Cake
Follow these simple steps to prepare this delicious Hostess Snowball Cake:
Step 1: Preheat and Prepare
Begin by preheating your oven to 350°F (175°C). Grease two round 9-inch baking pans with cooking spray or butter to ensure the cakes release easily after baking.
Step 2: Mix Dry Ingredients
In a mixing bowl, whisk together the flour, cocoa powder, baking powder, and a pinch of salt. This helps combine all the dry ingredients and ensure even distribution in your cake batter.
Step 3: Cream Butter and Sugar
In a separate large bowl, cream the softened butter and granulated sugar together using an electric mixer on medium speed until the mixture is light and fluffy—this should take about 3 to 4 minutes.
Step 4: Combine Wet Ingredients
Add the eggs one at a time, mixing well after each addition. Then stir in the milk until everything is smoother than a quiet jazz club on a lazy Sunday afternoon.
Step 5: Fold in Dry Ingredients
Gradually fold in the dry ingredients into your wet mixture. Be careful not to over-mix; just stir until everything is combined. Your batter should look smooth and oddly comforting—like your favorite pair of sweatpants.
Step 6: Bake the Cakes
Divide the batter evenly between the prepared baking pans and bake for 25-30 minutes. You’ll know they’re done when a toothpick inserted into the center comes out clean or with just a few crumbs clinging to it.
Step 7: Cool and Frost
Allow the cakes to cool completely in their pans on a wire rack. Once cooled, take one layer and spread a generous amount of marshmallow fluff on top, then stack the second layer on top. Coat the top with more marshmallow fluff and roll the sides in shredded coconut for that perfect snowball look.
To serve, slice generously and find a cozy spot on your couch to enjoy this delightful Hostess Snowball Cake. Don’t forget to share a slice or two (or keep it all to yourself—no judgment here). Enjoy the riot of flavors, the joy it brings, and the memories you create while indulging in this dessert!

Perfect Results, Every Single Time! 🌡️
Never serve dry or undercooked food again. The Chef-X Digital Probe gives you an accurate temperature reading in under 3 seconds. It's the secret tool I use for perfect steaks, juicy chicken, and safe milk temperatures.

This showstopping Hostess Snowball Cake delivers restaurant-quality results using simple ingredients you probably already have at home. The perfect balance of textures and flavors creates an unforgettable dining experience that will have everyone asking for seconds. Picture-perfect presentation with vibrant colors makes this dish absolutely Instagram-worthy and guaranteed to impress any dinner guest. Incredibly versatile recipe that works beautifully for weeknight dinners, meal prep, special occasions, or even outdoor entertaining sessions.
Perfecting Hostess Snowball Cake Cooking Process
To create the perfect Hostess Snowball Cake, start by preparing your baking pans and preheating the oven. While the oven warms up, whisk the dry ingredients together. Next, cream the butter and sugar until fluffy, then combine the wet ingredients. Finally, fold in the dry ingredients, divide the batter, and bake.
Add Your Touch to Hostess Snowball Cake
Feel free to customize your Hostess Snowball Cake by swapping out regular milk for almond or coconut milk or adding a splash of vanilla extract for extra flavor. You can also mix in chocolate chips or nuts to the batter for added texture. The coconut can be replaced with crushed graham crackers for a different twist.
Storing & Reheating Hostess Snowball Cake
Store any leftover Hostess Snowball Cake in an airtight container at room temperature for up to three days. To reheat, simply pop individual slices in the microwave for about 10-15 seconds. For a touch of warmth, you can also let it sit at room temperature for a bit before serving.
Chef's Helpful Tips for Hostess Snowball Cake
- This professional-quality Hostess Snowball Cake relies on precise timing and temperature control to achieve restaurant-standard results consistently.
- Master the art of mise en place by prepping all ingredients beforehand, ensuring smooth execution and preventing any last-minute cooking disasters.
- The secret lies in layering flavors throughout the cooking process rather than seasoning only at the end for maximum depth.
- Pro tip: let the finished dish rest for optimal texture and flavor development before serving to hungry guests waiting eagerly.
One Sunday, I whipped up this cake for a family gathering, and the kids went wild over it. I’ll never forget the sight of frosting-covered smiles and sticky fingers reaching for seconds. It confirmed that this cake brings joy and sweet chaos to any occasion.
FAQs About Hostess Snowball Cake
What is Hostess Snowball Cake?
Hostess Snowball Cake is a delightful, indulgent dessert inspired by the beloved Hostess snack. This cake is made of rich chocolate layers, filled and coated with fluffy marshmallow fluff, and rolled in sweetened shredded coconut. The combination of moist cake and creamy filling creates a delightful contrast in flavors and textures, making it a favorite at gatherings and celebrations. If you’re looking for a showstopping dessert that pleases both kids and adults alike, this cake is your answer.
How should I store leftover Hostess Snowball Cake?
To keep your Hostess Snowball Cake fresh, store it in an airtight container at room temperature for up to three days. If you live in a particularly warm climate, it’s best to refrigerate leftovers to maintain the fluffiness of the frosting. You can also freeze the cake for longer storage. Just make sure to wrap it tightly in plastic wrap and aluminum foil. When ready to enjoy, simply let it thaw at room temperature or microwave individual slices for a quick treat.
Can I customize my Hostess Snowball Cake?
Absolutely! One of the best parts of making a Hostess Snowball Cake is the ability to personalize it. You can swap the regular milk for almond or oat milk for a dairy-free version. Adding a splash of vanilla can elevate the flavor. Want some crunch? Mix in chocolate chips or nuts. Feeling adventurous? Try replacing the coconut coating with crushed graham crackers for a different taste experience. Your creativity is the limit!
What occasions are perfect for serving Hostess Snowball Cake?
Hostess Snowball Cake is versatile and can brighten up any occasion! Whether it’s birthdays, anniversaries, or holiday get-togethers, this cake is a hit. It also makes a scrumptious dessert at casual dinners and is excellent for potlucks or bake sales. Thanks to its eye-catching appearance and rich flavor, this cake is perfect for impressing friends and family or simply enjoying at home after a long day.
Conclusion for Hostess Snowball Cake
In conclusion, Hostess Snowball Cake is an irresistible dessert that combines rich chocolate with the sweetness of marshmallow fluff and coconut. This delightful recipe is simple to make and can be customized to suit various tastes. Whether you’re celebrating a special occasion or simply indulging in a sweet treat, this cake is sure to impress everyone at the table. Save this recipe for your next gathering, and prepare to watch it disappear!

Hostess Snowball Cake
Ingredients
Equipment
Method
- Preheat your oven to 350°F (175°C) and grease two round 9-inch baking pans.
- In a bowl, whisk together flour, cocoa powder, baking powder, and a pinch of salt.
- In another bowl, cream the butter and sugar until light and fluffy (about 3-4 minutes).
- Add eggs one at a time, mixing well after each addition. Stir in milk until combined.
- Gradually fold the dry ingredients into the wet batter until just combined.
- Divide the batter between the prepared pans and bake for 25-30 minutes or until a toothpick comes out clean.
- Let cakes cool completely before spreading marshmallow fluff on one layer, stacking with the second layer, then coating with more fluff and rolling in coconut.

Leave a Comment