

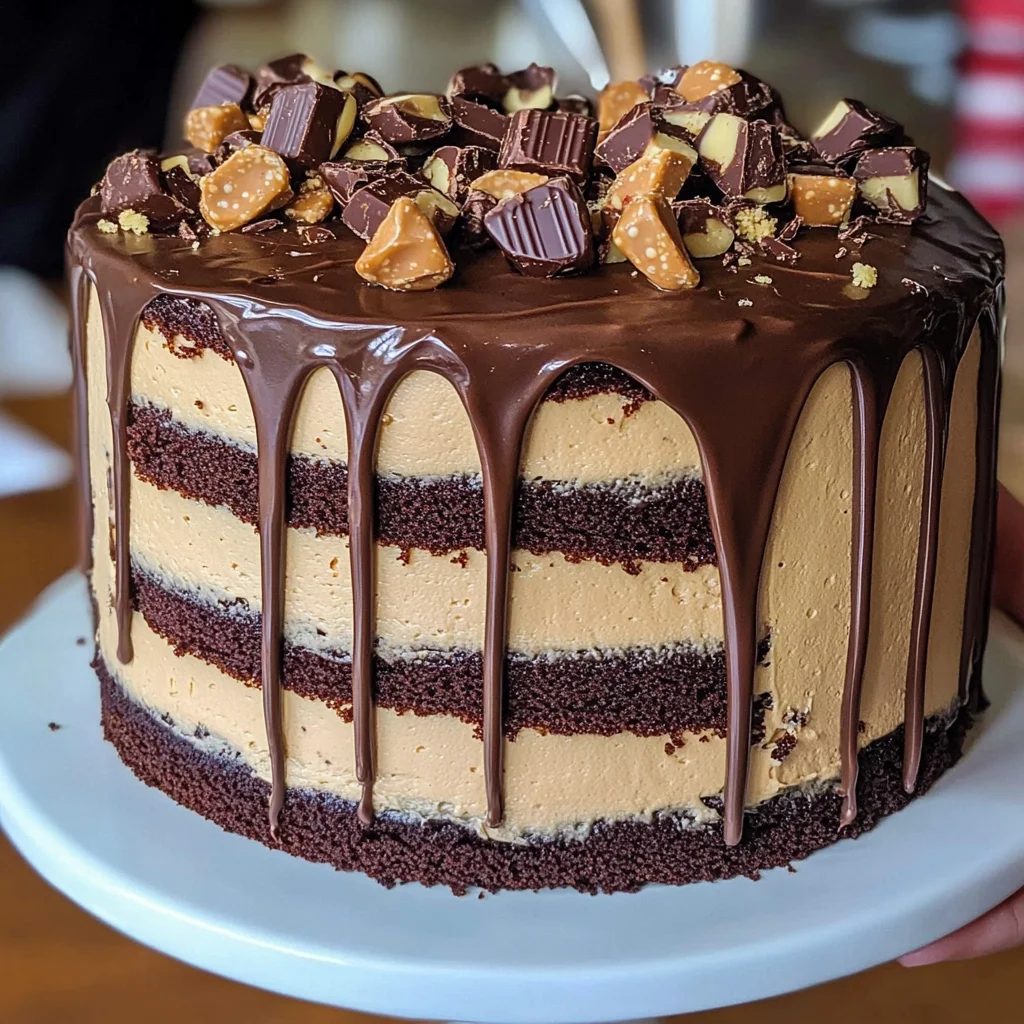
The moment I first took a bite of a Reese’s Chocolate Peanut Butter Cake, I knew I had stumbled upon something truly magical. It’s more than just a dessert; it’s a celebration of the perfect marriage between chocolate and peanut butter, a duo that has stolen hearts for generations. Imagine the rich, velvety chocolate cake layers, each one oozing with moisture and flavor, perfectly complemented by a creamy peanut butter frosting that whispers sweet nothings to your taste buds. And then there are those delectable chunks of Reese’s peanut butter cups that bring an irresistible crunch to every mouthful—it’s honestly like a symphony of flavors dancing on your palate! This recipe is not just about satisfying your sweet tooth; it’s about creating memories, delighting in the simple pleasure of baking, and indulging in something that feels deeply nostalgic.
This cake has a way of bringing people together. Whether you’re celebrating a birthday, hosting a casual get-together with friends, or simply treating yourself after a long day, this cake does it all. The delightful contrast between the rich chocolate and the creamy peanut butter is something so many people adore; it’s an experience that transcends mere sustenance. Every slice reveals layers of love, effort, and joy—a true testament to how food can connect us on deeper levels. So let’s roll up our sleeves and dive into making this Reese’s Chocolate Peanut Butter Cake together!
Reese’s Chocolate Peanut Butter Cake: A Decadent Delight
There’s something incredibly special about this Reese’s Chocolate Peanut Butter Cake that makes it stand out from the crowd. With its moist chocolate layers and luxurious peanut butter frosting, it promises to be every bit as irresistible as it sounds. Plus, let’s not forget those iconic Reese’s cups scattered throughout! Grab your apron and let’s embark on this delicious journey!

Perfect Results, Every Single Time! 🌡️
Never serve dry or undercooked food again. The Chef-X Digital Probe gives you an accurate temperature reading in under 3 seconds. It's the secret tool I use for perfect steaks, juicy chicken, and safe milk temperatures.
Ingredients:
As we begin this culinary adventure together, let me guide you through the essential ingredients that will make our Reese’s Chocolate Peanut Butter Cake truly extraordinary. Each component plays a vital role in crafting flavors and textures that will leave everyone wanting more.
- 2 cups all-purpose flour (260g). This is the backbone of our cake—providing structure and stability while allowing it to rise beautifully in the oven. When choosing flour, look for a high-quality brand with protein content around 10-12%. You might be tempted to substitute whole wheat flour for added nutrition; however, because we want that soft crumb texture typical of cakes, stick with all-purpose here for optimal results.
- 2 cups granulated sugar (400g). Sugar isn’t just for sweetness; it also impacts moisture retention and helps achieve that beautiful golden crust we crave in baked goods. When measuring sugar, ensure you spoon it into your measuring cup before leveling—it helps avoid packing too much into your cup which could lead to overly sweet or dense results.
- 3/4 cup unsweetened cocoa powder, sifted (75g). Cocoa powder brings depth to our chocolate flavor profile without adding any unwanted sweetness—this is crucial for balancing out the richness from our peanut butter later on. Sifting this ingredient removes clumps and ensures even distribution throughout the batter; trust me when I say: never skip this step!
- 2 tsp baking powder (8g) & 1 1/2 tsp baking soda (9g). These two leavening agents are like magic wands for our cake—they create those lovely air bubbles that will help our cake rise and develop that fluffy texture we adore. Baking soda needs an acid to activate (like our sour cream), while baking powder works independently; together they ensure our cake has enough lift without collapsing post-bake.
- 1 tsp fine salt (6g). Salt enhances flavors—it may seem counterintuitive in desserts but hear me out! Just like how salt elevates savory dishes, here it balances out sweetness and enriches the overall flavor profile of our cake.
- 1 cup warm water (240g). Adding warm water helps dissolve dry ingredients quickly before they hit the mixer—ensuring everything blends seamlessly together without any lumps or pockets of flour hiding away! It also provides moisture during mixing which is vital for achieving that tender crumb.
- 1 cup full-fat sour cream, room temperature (255g). Sour cream adds richness and moisture while contributing slight acidity to balance out sweetness—a game changer! Make sure it’s at room temperature so it blends effortlessly into your batter rather than cooling down other ingredients.
- 1/2 cup vegetable or canola oil (110g). Oil keeps our cake moist over time compared to butter which can harden as it cools down post-baking; plus it aids in achieving that soft texture we love so much! Feel free to substitute with melted coconut oil if you desire a different flavor profile.
- 2 large eggs, room temperature (112g). Eggs are crucial for binding everything together while providing structure—we want them at room temperature so they incorporate smoothly into the batter without shocking other ingredients.
- 2 tsp vanilla extract or vanilla bean paste (8g). Vanilla adds warmth and complexity to desserts—it’s like the secret handshake among flavors! Always choose pure extracts whenever possible for authentic taste instead of synthetic options.
- 1 tsp instant espresso or coffee – optional (1g). This might sound unusual but trust me—the addition of espresso intensifies chocolate flavors without imparting any noticeable coffee flavor itself! It’s simply there to elevate everything else on your plate.
- 1 1/2 cups (3 sticks) unsalted butter, room temperature (339g). Room temperature butter is non-negotiable when creaming—this ensures maximum aeration during mixing leading us straight toward fluffy bliss! Stick with unsalted here; we’ll add salt separately for better control over flavor balance later on.
- 1 cup creamy peanut butter (250g) & 1 tsp vanilla extract or vanilla bean paste (4g) & 1/2 tsp fine salt (3g) for frosting . Creamy peanut butter gives us smoothness while enhancing both richness AND nutty flavors; likewise incorporating vanilla extract amplifies its signature taste further while salt brings harmony throughout each luscious bite!
- 7 cups powdered sugar (904g or 2 lb bag) . Powdered sugar provides sweetness plus creates stability within frosting by holding air bubbles easily—it gives us that whipped consistency we’re aiming for!
- 1/3 cup heavy whipping cream, room temperature (80g) – twice . Heavy whipping cream adds lusciousness plus lightness into our frosting mixture making every mouthful feel indulgent yet airy—again being at room temp matters here as well!
- 1/2 cup milk chocolate chips (85g). These little morsels fold beautifully into frosting providing texture plus extra bursts of sweetness which play wonderfully against rich peanut buttery notes found throughout layers below!
- 1 cup peanut butter . We’ll just fold in some extra crunchy bits right before serving if desired—but do make sure what’s used here matches initial tastes found within earlier components!
- 2 cups chopped Reese’s peanut butter cups . Ah yes—the pièce de résistance! These delightful nuggets add both crunchiness PLUS surprise bites filled with nostalgia—as if childhood were served up within every slice shared across loved ones gathered around table today!
Equipment You’ll Need:
Before diving headfirst into mixing up this deliciousness together—I want you to ensure you have all necessary tools at hand! Trust me when I say having reliable equipment makes all difference between success/failure during baking escapades ahead.
- Mixing bowls – A set of various sizes will serve you well here; larger bowls allow ample space needed when blending batters whereas smaller ones come handy while preparing frostings/toppings alongside other components later down line!
- Electric mixer – This tool is absolutely paramount for achieving light textures within both cake AND frosting effortlessly—be sure yours has multiple speeds too since different stages require varied techniques ranging from gentle folding up high-speed creaming processes altogether!
- Measuring cups/spoons – Precision matters immensely especially when baking desserts like these since ratios determine final outcomes directly affecting taste consistency along way forward—always remember: spoon dry ingredients lightly then level off rather than scooping directly from container itself next time around…
- Rubber spatula – Essential partner during mixing process allowing easy scraping sides cleanly ensuring every last bit gets incorporated properly without wasting anything along journey towards completion ahead!!
Now that we’re equipped—and ready—you’ll soon realize how rewarding creating homemade treats truly can be once all pieces fall harmoniously together creating unforgettable experiences shared along loved ones over slices enjoyed best enjoyed fresh out oven right after cooling slightly down…
Preparing the Reese’s Chocolate Peanut Butter Cake
Step 1: Prepping Your Baking Pans
First things first: let’s get those baking pans ready to embrace our delicious batter! Start by preheating your oven to 350°F (175°C)—you want it nice and hot when you’re ready to pop those cakes in so they rise beautifully from start till finish without risking dryness later on down road ahead either way too fast perhaps… Once that’s done grab two 9-inch round cake pans; lightly grease them using either cooking spray OR softened butter followed by dusting lightly with flour afterwards shaking off excess gently afterwards too please!! This ensures nothing sticks onto surfaces once baked resulting in perfect release every single time without having any issues whatsoever afterward during removal process too—all vital steps worth taking care carefully upfront now rather than risking anything potentially ruining final outcome further along journey either way ahead towards enjoying each slice shared happily amongst family/friends alike soon thereafter!.
Step 2: Mixing Dry Ingredients
Now it’s time we turn attention towards bringing together dry components listed previously mentioned earlier above—we’ll start by combining flour,cocoa powder,baking soda,baking powder,salt into large bowl whisking until fully combined evenly distributing everything thoroughly throughout mixture evenly preventing clumping happening later during mixing stages thereafter… Take care doing so because proper incorporation allows even rising later ensuring uniform texture maintained across entire surface area present ultimately giving us stunning visual appeal once served shortly thereafter too!!
Step 3: Creaming Butter & Sugar Together
Next up comes what I consider one most fun parts getting hands dirty creaming softened unsalted butter alongside granulated sugar until pale fluffy state reached about five minutes total duration required depending speed chosen previously mentioned before… This process known as creaming introduces air pockets within mixture promoting lightness achieved after baked correctly thus resulting end product proving utterly intoxicating experience altogether later enjoyed thoroughly shared loved ones gathered around table near afterwards still warm right after cooling slightly down presenting slices served eagerly awaited finally unveiled at last amidst laughter/good vibes surrounding atmosphere created forthwith present joyful encounters made memorable lasting impressions crafted lovingly through efforts shown throughout preparation stages witnessed unfolding gradually piece-by-piece culminating beautifully eventually reaching completion point together…
Step 4: Incorporating Wet Ingredients Gradually
Once you’ve achieved that beautiful creamy mixture take moment breathe enjoy aroma lingering sweetly around kitchen atmosphere full anticipation building excitement ahead next steps taken soon thereafter as well! Now slowly drizzle warm water along previously prepared sour cream beating continuously ensuring everything gets blended nicely until homogenous consistency reached overall maintaining quality features intact always staying mindful keeping eye upon appearance formation developing steadily throughout process allowing adjustments made accordingly should things appear off slightly perhaps meaning more attention needed given conditions faced currently encountered along way going forward….
And there you have it—our journey through crafting this decadent Reese’s Chocolate Peanut Butter Cake is just beginning! Each step brings us closer to an extraordinary treat filled with love and cherished moments waiting eagerly ahead where laughter echoes joyously around tables shared amongst family/friends alike relishing sweet indulgences made lovingly crafted right inside kitchens everywhere transforming ordinary days into extraordinary celebrations worthy remembering fondly forevermore…
Step 5: Create the Luxurious Chocolate Cake Batter
Now that we’ve assembled all our dry ingredients, it’s time to bring everything together into a rich, velvety batter that will form the base of our Reese’s Chocolate Peanut Butter Cake. Begin by preheating your oven to 350°F (175°C) if you haven’t done so already—this is crucial because we want our cake layers to rise perfectly and develop that beautiful structure. In your mixing bowl, combine your dry ingredients—the flour, sugar, cocoa powder, baking powder, baking soda, and salt. This blend is like the backbone of your cake; each component plays a vital role in achieving that moist and tender crumb we all adore.
Next, create a well in the center of your dry mixture. This is where the magic happens! Pour in your warm water, sour cream, vegetable oil, eggs, and vanilla extract. The warmth from the water helps to activate the cocoa powder and the baking soda; it’s a small but mighty detail that will enhance the chocolate flavor and contribute to a tender texture. Now comes my favorite part—mixing! Use an electric mixer on medium speed for about 2 minutes until everything is combined into a silky batter. Don’t be alarmed if it looks a bit runny; this is normal! The wet ingredients are essential for keeping our cake moist while baking. If you have opted for instant espresso or coffee, now is the time to add it; it amplifies the chocolate flavor without making your cake taste like coffee—trust me on this!
Step 6: Baking the Layers to Perfection
Once your batter is ready and looking absolutely decadent, it’s time to pour it into your prepared cake pans. Make sure you divide the batter equally among three 9-inch round pans—this ensures even baking and makes for beautifully symmetrical layers. I always take a moment to gently tap each filled pan on the countertop; this helps release any air bubbles trapped in the batter which could cause uneven rising or undesirable texture. It’s those little details that make all the difference!
Bake these luscious layers in your preheated oven for about 24-26 minutes or until a toothpick inserted in the center comes out clean with just a few moist crumbs attached. Oh, the aroma wafting through your kitchen during this time will be nothing short of intoxicating! As they bake, resist the urge to open that oven door too soon; every time you peek inside, you let precious heat escape which can lead to collapsed cakes. Instead, use this time wisely—imagine how wonderful it will feel when you finally get to frost them with creamy peanut butter goodness! Once done baking, allow them to cool in their pans for about 10-15 minutes before transferring them onto wire racks to cool completely. This step allows steam to escape while preventing soggy bottoms—a non-negotiable aspect if you want flawless cake layers.
Step 7: Crafting That Irresistible Peanut Butter Frosting
While those divine chocolate layers cool down patiently (and trust me, you’ll want them completely cool before frosting), let’s turn our attention to creating that rich peanut butter frosting which is literally going to elevate this cake into something truly extraordinary! Start by beating together your room temperature butter and creamy peanut butter in a large mixing bowl using an electric mixer on medium speed until they become light and fluffy—about 3-5 minutes should do it. The key here is aeration; creaming these two ingredients creates tiny air pockets which lead to an airy frosting that spreads beautifully across our cake layers.
As you mix, gradually add in powdered sugar and salt while alternating with heavy whipping cream. It’s essential not to dump everything in at once; otherwise, you’ll end up with a cloud of powdered sugar mist—and believe me when I say no one wants that mess! Mixing gradually allows for better incorporation of sugar without overwhelming the mixture at any stage. You’ll notice as you continue mixing that this frosting thickens up beautifully; aim for a spreadable yet firm consistency—it should hold its shape when piped but still be easy enough to work with when spreading between layers or over the top of your cake.
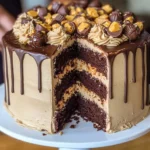
Step 8: Assembling Your Masterpiece
With both your cake layers fully cooled and luscious peanut butter frosting ready at hand, it’s finally time for one of my favorite parts: assembling this Reese’s Chocolate Peanut Butter Cake! Start by placing one layer on your serving platter or cake stand—make sure it’s sturdy enough because this beauty will be layered high with all sorts of deliciousness! Using an offset spatula or simply a butter knife dipped lightly in warm water (to help glide smoothly), spread an even layer of peanut butter frosting on top of this first layer. Don’t skimp here! A generous amount adds not only flavor but also keeps everything wonderfully moist.
Carefully place another layer on top of that frosted layer and repeat the process until all three layers are stacked high with creamy goodness between each one—a tower of chocolatey-peanut-buttery delight! Don’t rush this step; take your time smoothing out each layer as you go along because presentation matters too! Once assembled, apply a thin coat of frosting around the sides and top—the infamous “crumb coat.” This acts like a protective barrier around those delicate crumbs while helping future frosting adhere better. Chill your cake for at least 30 minutes after applying this initial coat; I promise you—it makes handling much easier when decorating later!
Next Major Phase – Final Touches
Now we’re nearing completion of our glorious creation! After allowing that crumb coat some chill time in the fridge (which also gives us some much-needed patience), we can dive into decorating our masterpiece with more luscious peanut butter frosting and those irresistible chopped Reese’s peanut butter cups!
Step 9: Decorating Your Reese’s Chocolate Peanut Butter Cake
Once chilled from its crumb coat session, remove your cake from refrigeration and get ready for an explosion of flavors! Grab that remaining peanut butter frosting and generously cover every inch of your beautifully stacked layers—don’t forget about smoothing out those sides too! As you’re applying frosting, feel free to pipe any decorative elements if you’re feeling fancy—a simple star tip works wonders for creating charming swirls atop each layer or along edges.
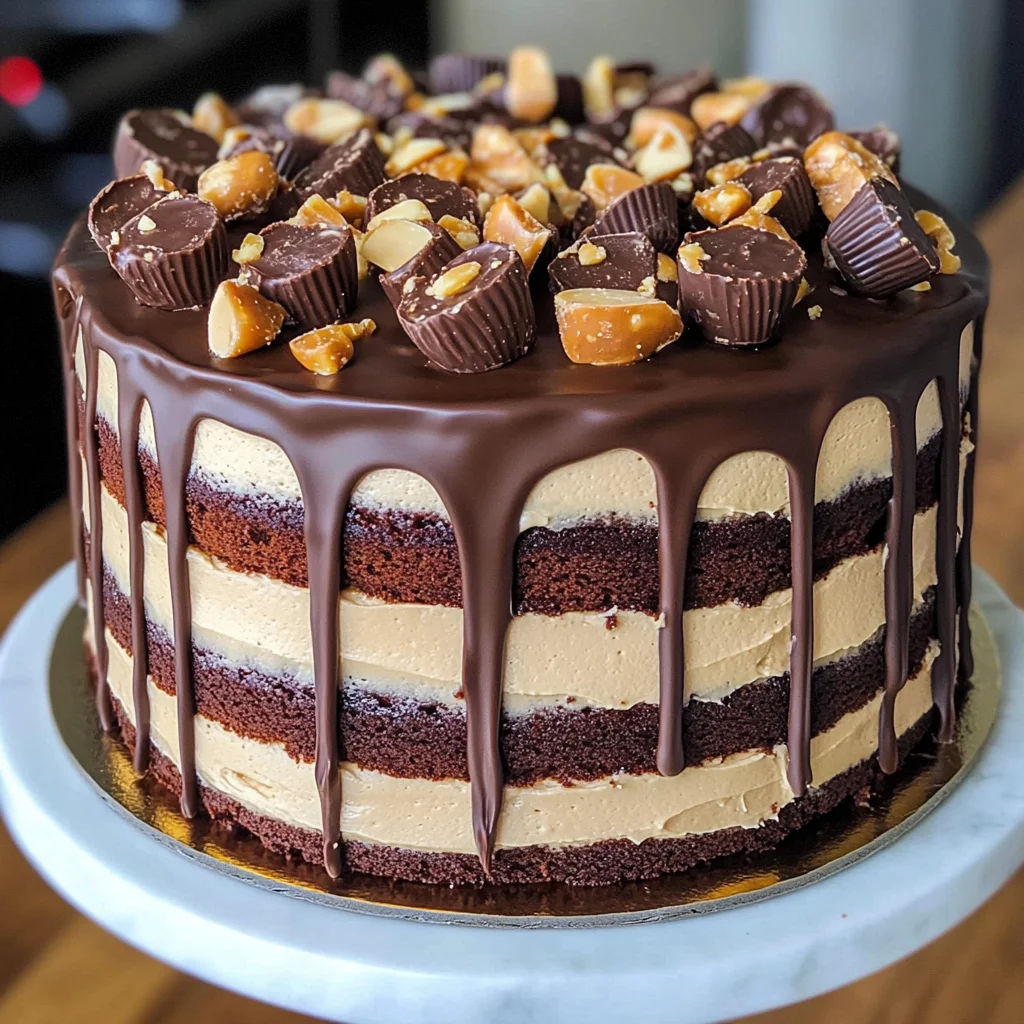
Now comes my absolute favorite part: adorning with chopped Reese’s peanut butter cups! Sprinkle them generously over the top; their sweet crunch will provide delightful contrast against that silky smooth frosting while adding visual appeal that’s simply irresistible. If you’re feeling adventurous (and I know you are!), consider drizzling some melted chocolate over everything—it adds such elegance while heightening those chocolatey notes even further.
Finally, once you’ve decorated every nook and cranny just how you’d like them—step back and admire what you’ve created… because I promise you—it’s not just any treat; it’s pure love baked into layers! Allowing it some time at room temperature before slicing will enhance flavors even more as they meld beautifully together—a symphony of flavors waiting just beneath that gorgeous exterior.
And there you have it—a stunning Reese’s Chocolate Peanut Butter Cake ready to impress friends and family alike at any celebration or simply as a sweet indulgence just because you deserve it! Enjoy every bite knowing you’ve crafted something truly special from scratch—all while sharing passionate moments spent in love with food!
Storage and Enjoyment Tips for Your Reese’s Chocolate Peanut Butter Cake
Now that you’ve created this luscious masterpiece, the question is: how do you savor every last crumb? This Reese’s Chocolate Peanut Butter Cake is not just a delight for the moment; it’s an experience that keeps on giving! Whether you’re planning to serve it right away or save some for later indulgence, I’ve got you covered with all the tips you need to ensure those flavors remain as vibrant and intoxicating as when it first emerged from the oven.
Storing Leftover Reese’s Chocolate Peanut Butter Cake
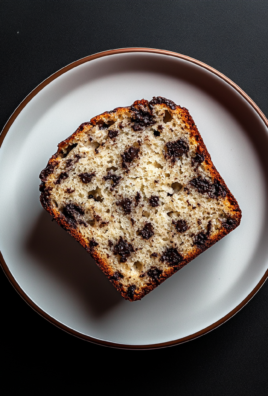
To keep your cake in tip-top shape, I recommend placing it in an airtight container. This will help lock in that incredible moisture and keep the flavors fresh. Ideally, store it at room temperature if you plan on enjoying it within a couple of days. If not, pop it in the fridge, where it will stay fabulous for up to a week. A little pro tip I swear by? Place a slice of bread inside the container with your cake. The bread will absorb any excess moisture and help prevent your cake from drying out—trust me on this one! After a few days, you’ll still find yourself biting into a piece that’s remarkably moist and bursting with creamy peanut butter goodness mingling with rich chocolate notes. When you’re ready to enjoy another slice, simply let it come to room temperature or give it a quick 10-second zap in the microwave for that warm, gooey sensation!
Freezing Components for Later
If you’re looking ahead and want to stock up on this decadent treat, freezing parts of your Reese’s Chocolate Peanut Butter Cake is an absolute game-changer! You can freeze individual layers or even slices wrapped tightly in plastic wrap and then placed in a freezer bag. This way, each piece stays protected from freezer burn and maintains its delightful freshness. It can remain frozen for up to three months without losing its charm—how wonderful is that? When you’re ready to dive back into this chocolatey paradise, simply transfer your desired layer or slice to the fridge overnight to thaw naturally. The convenience this method offers is fantastic; imagine having a slice of this heavenly cake waiting for you after a long day—it’s like unwrapping a gift from yourself! So go ahead and embrace the joy of preparing ahead; future you will thank present you!
Dessert
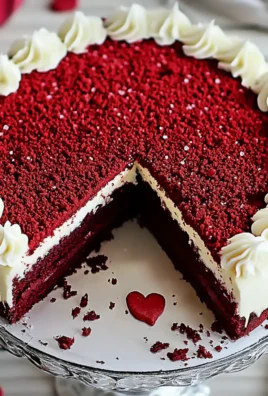
Reese’s Chocolate Peanut Butter Cake
Indulge in the delightful world of our Reese’s Chocolate Peanut Butter Cake—an exquisite dessert that marries moist chocolate layers with creamy peanut butter frosting. This decadent cake is a nostalgic treat perfect for any celebration or a sweet pick-me-up after a long day. The rich flavors of chocolate and peanut butter come together beautifully, enhanced by crunchy pieces of candy that make every bite a joyous experience. Whether you’re hosting a birthday party or simply treating yourself, this cake is sure to impress. Let’s dive into the simple steps to create this masterpiece!
- Prep Time: 30 minutes
- Cook Time: 26 minutes
- Total Time: 56 minutes
- Yield: Serves approximately 12 1x
- Category: Dessert
- Method: Baking
- Cuisine: American
Ingredients
- 2 cups all-purpose flour
- 2 cups granulated sugar
- 3/4 cup unsweetened cocoa powder
- 2 tsp baking powder
- 1 1/2 tsp baking soda
- 1 tsp fine salt
- 1 cup warm water
- 1 cup full-fat sour cream
- 1/2 cup vegetable oil
- 2 large eggs
- 2 tsp vanilla extract
- 1 cup creamy peanut butter
- 7 cups powdered sugar
- 1/3 cup heavy whipping cream
- 2 cups chopped Reese's peanut butter cups
Instructions
- Preheat your oven to 350°F (175°C). Grease and flour two 9-inch round cake pans.
- In a large mixing bowl, whisk together flour, sugar, cocoa powder, baking powder, baking soda, and salt.
- Create a well in the center and add warm water, sour cream, vegetable oil, eggs, and vanilla extract. Mix on medium speed until smooth.
- Divide the batter evenly between prepared pans. Bake for 24-26 minutes or until a toothpick inserted comes out clean.
- Allow cakes to cool for 10 minutes in pans before transferring to wire racks to cool completely.
- For the frosting, beat together room temperature butter and creamy peanut butter until light and fluffy. Gradually mix in powdered sugar and heavy whipping cream until desired consistency is reached.
- Assemble the cake by layering frosting between cooled cake layers and on top and sides of the cake. Decorate with chopped Reese's cups.
Nutrition
- Serving Size: 1 slice (150g)
- Calories: 530
- Sugar: 50g
- Sodium: 310mg
- Fat: 24g
- Saturated Fat: 7g
- Unsaturated Fat: 15g
- Trans Fat: 0g
- Carbohydrates: 71g
- Fiber: 3g
- Protein: 8g
- Cholesterol: 40mg
Leave a Comment